Introduction
FreePBX is a web-based open-source GUI that manages Asterisk, a powerful open-source telephony engine. This guide will walk you through the steps to set up FreePBX and Asterisk on a Linux server.
Similar to the Setup Moodle, I will use Azure Virtual Machine too. Due to the restriction within my school network, it blocks malicious traffic.
Prerequisites
This is what I used:
- Operating System: Debian 12 Bookworm (amd64)
- RAM: 4GB
- Disk Space: 20GB
- Network: Public IP address
- SSH Access: Ensure you can SSH into your server.
- Root Access: You need root or sudo privileges to install packages and configure the system.
- Firewall: Ensure that ports 22 (SSH), 80 (HTTP), 443 (HTTPS), and 5060 (SIP) are open.
Initial Setup
# Update the system
sudo apt update && sudo apt upgrade -y
# Run installation script (requires root privileges)
cd /tmp
wget https://github.com/FreePBX/sng_freepbx_debian_install/raw/master/sng_freepbx_debian_install.sh -O /tmp/sng_freepbx_debian_install.sh
bash /tmp/sng_freepbx_debian_install.sh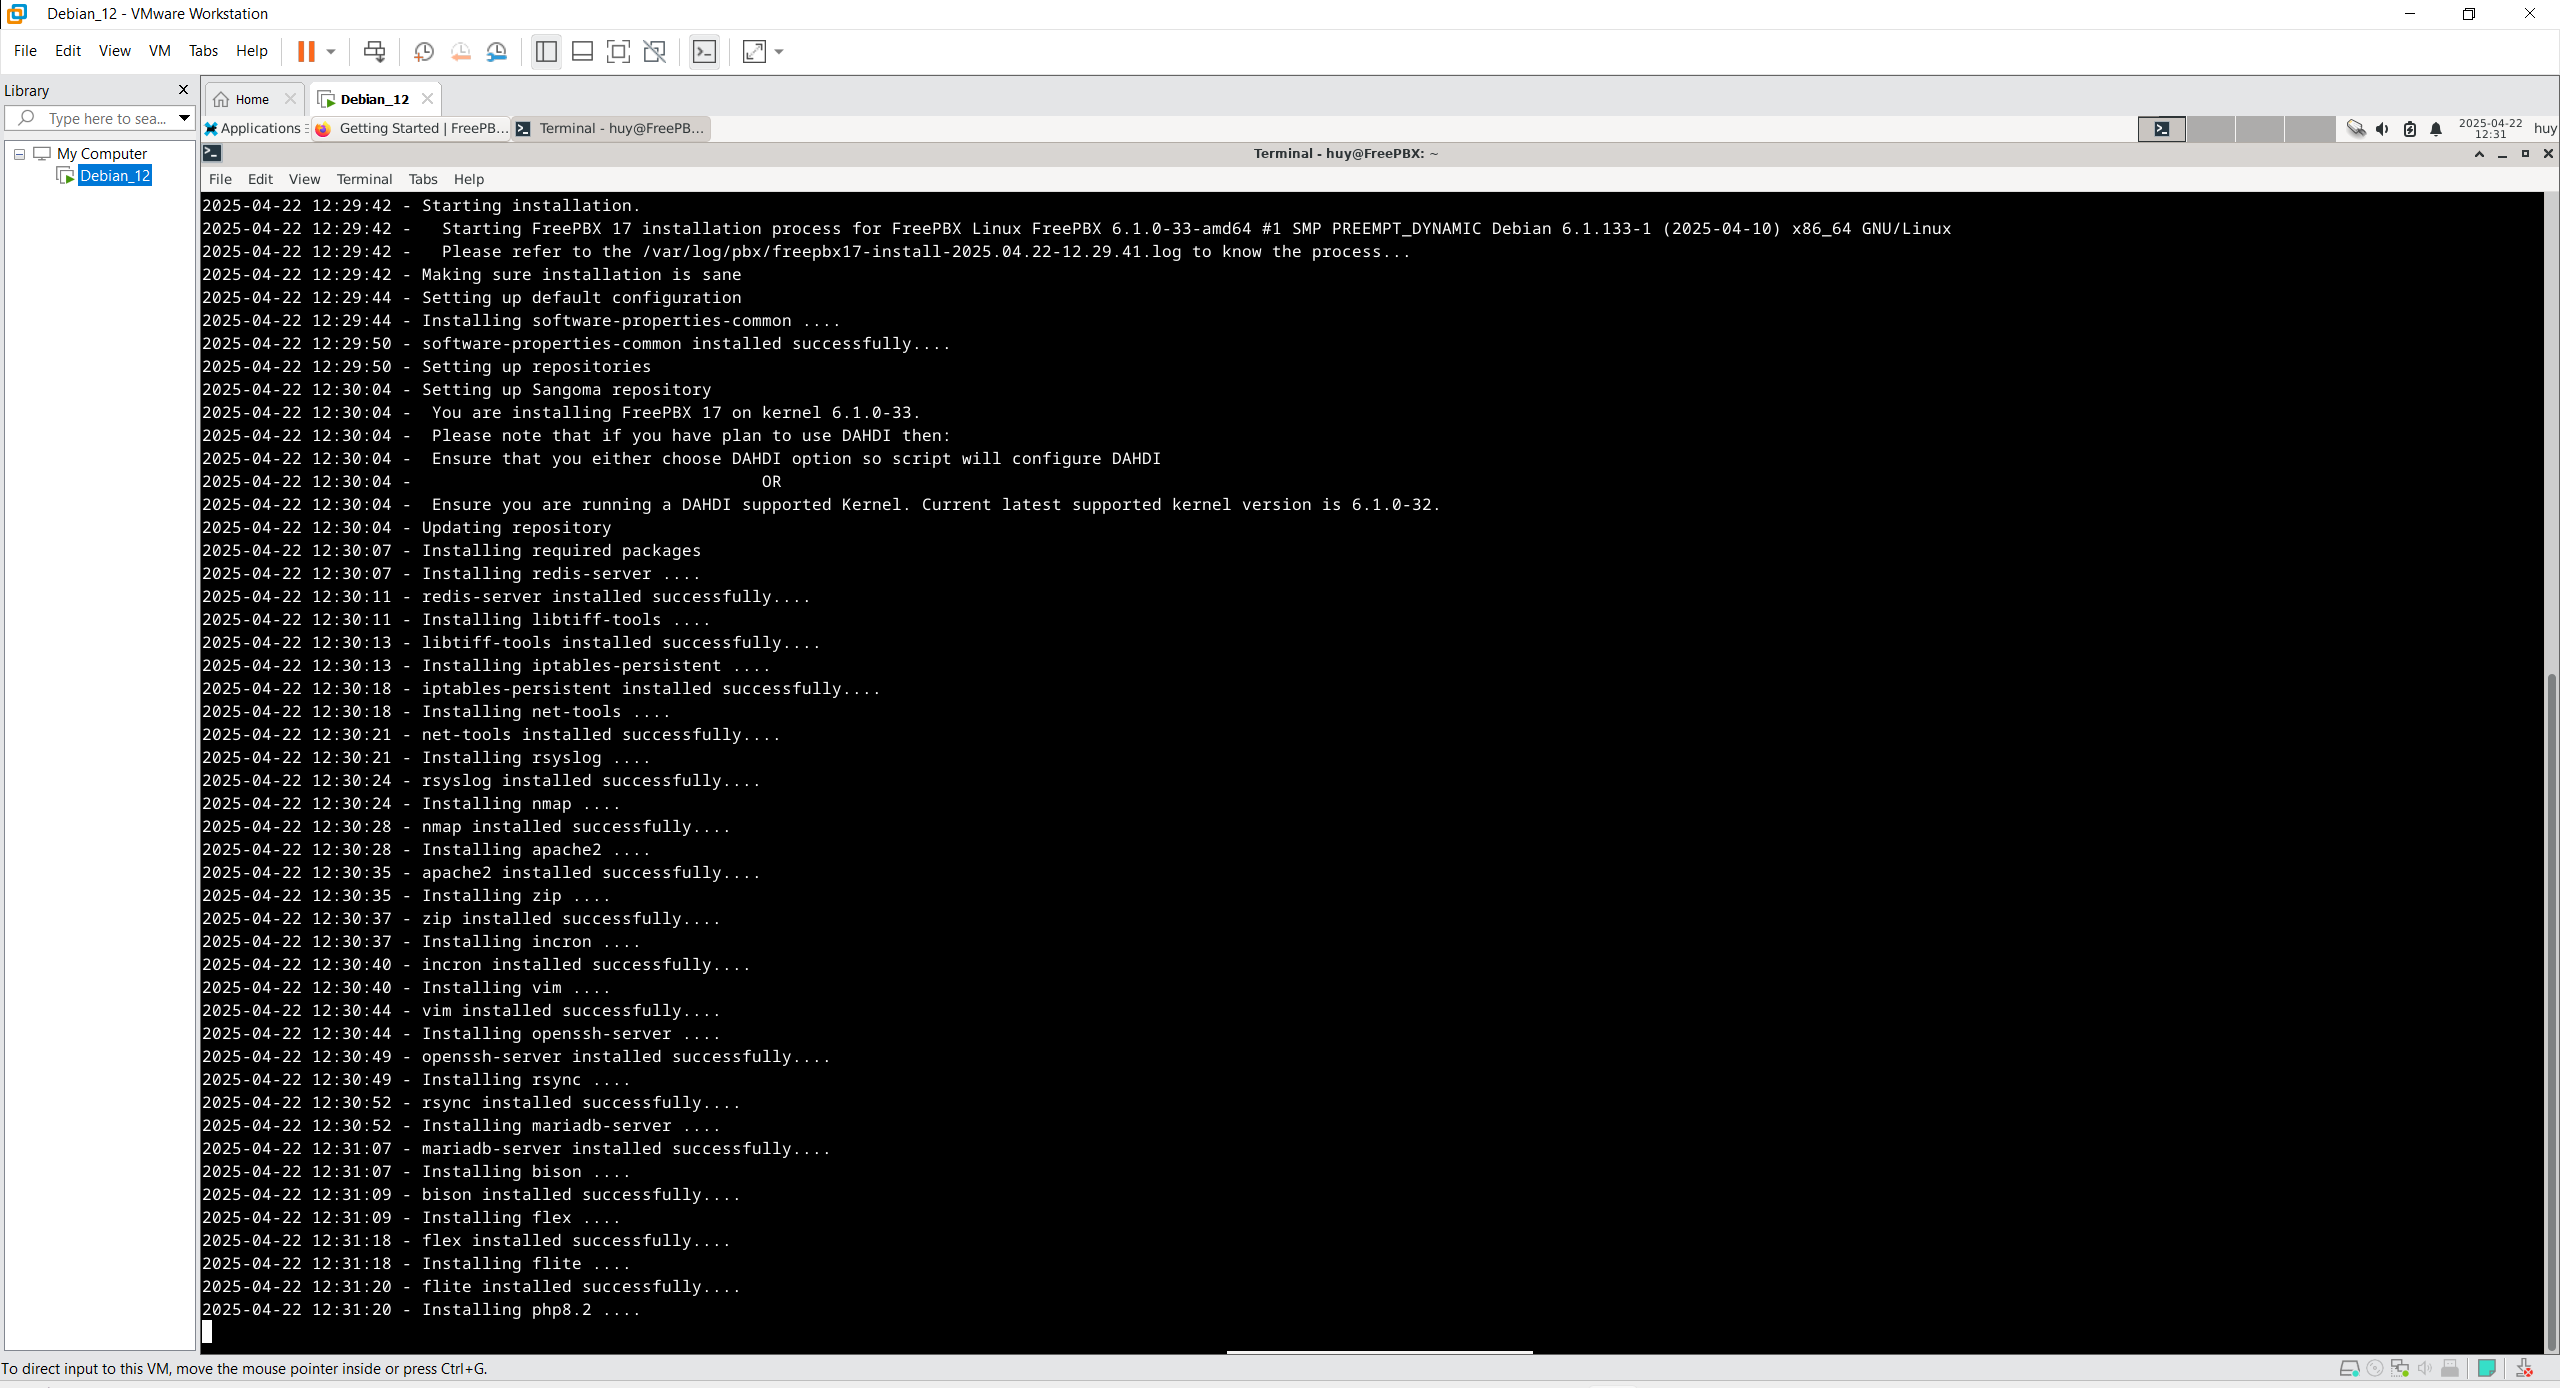 Figure 1: FreePBX installing
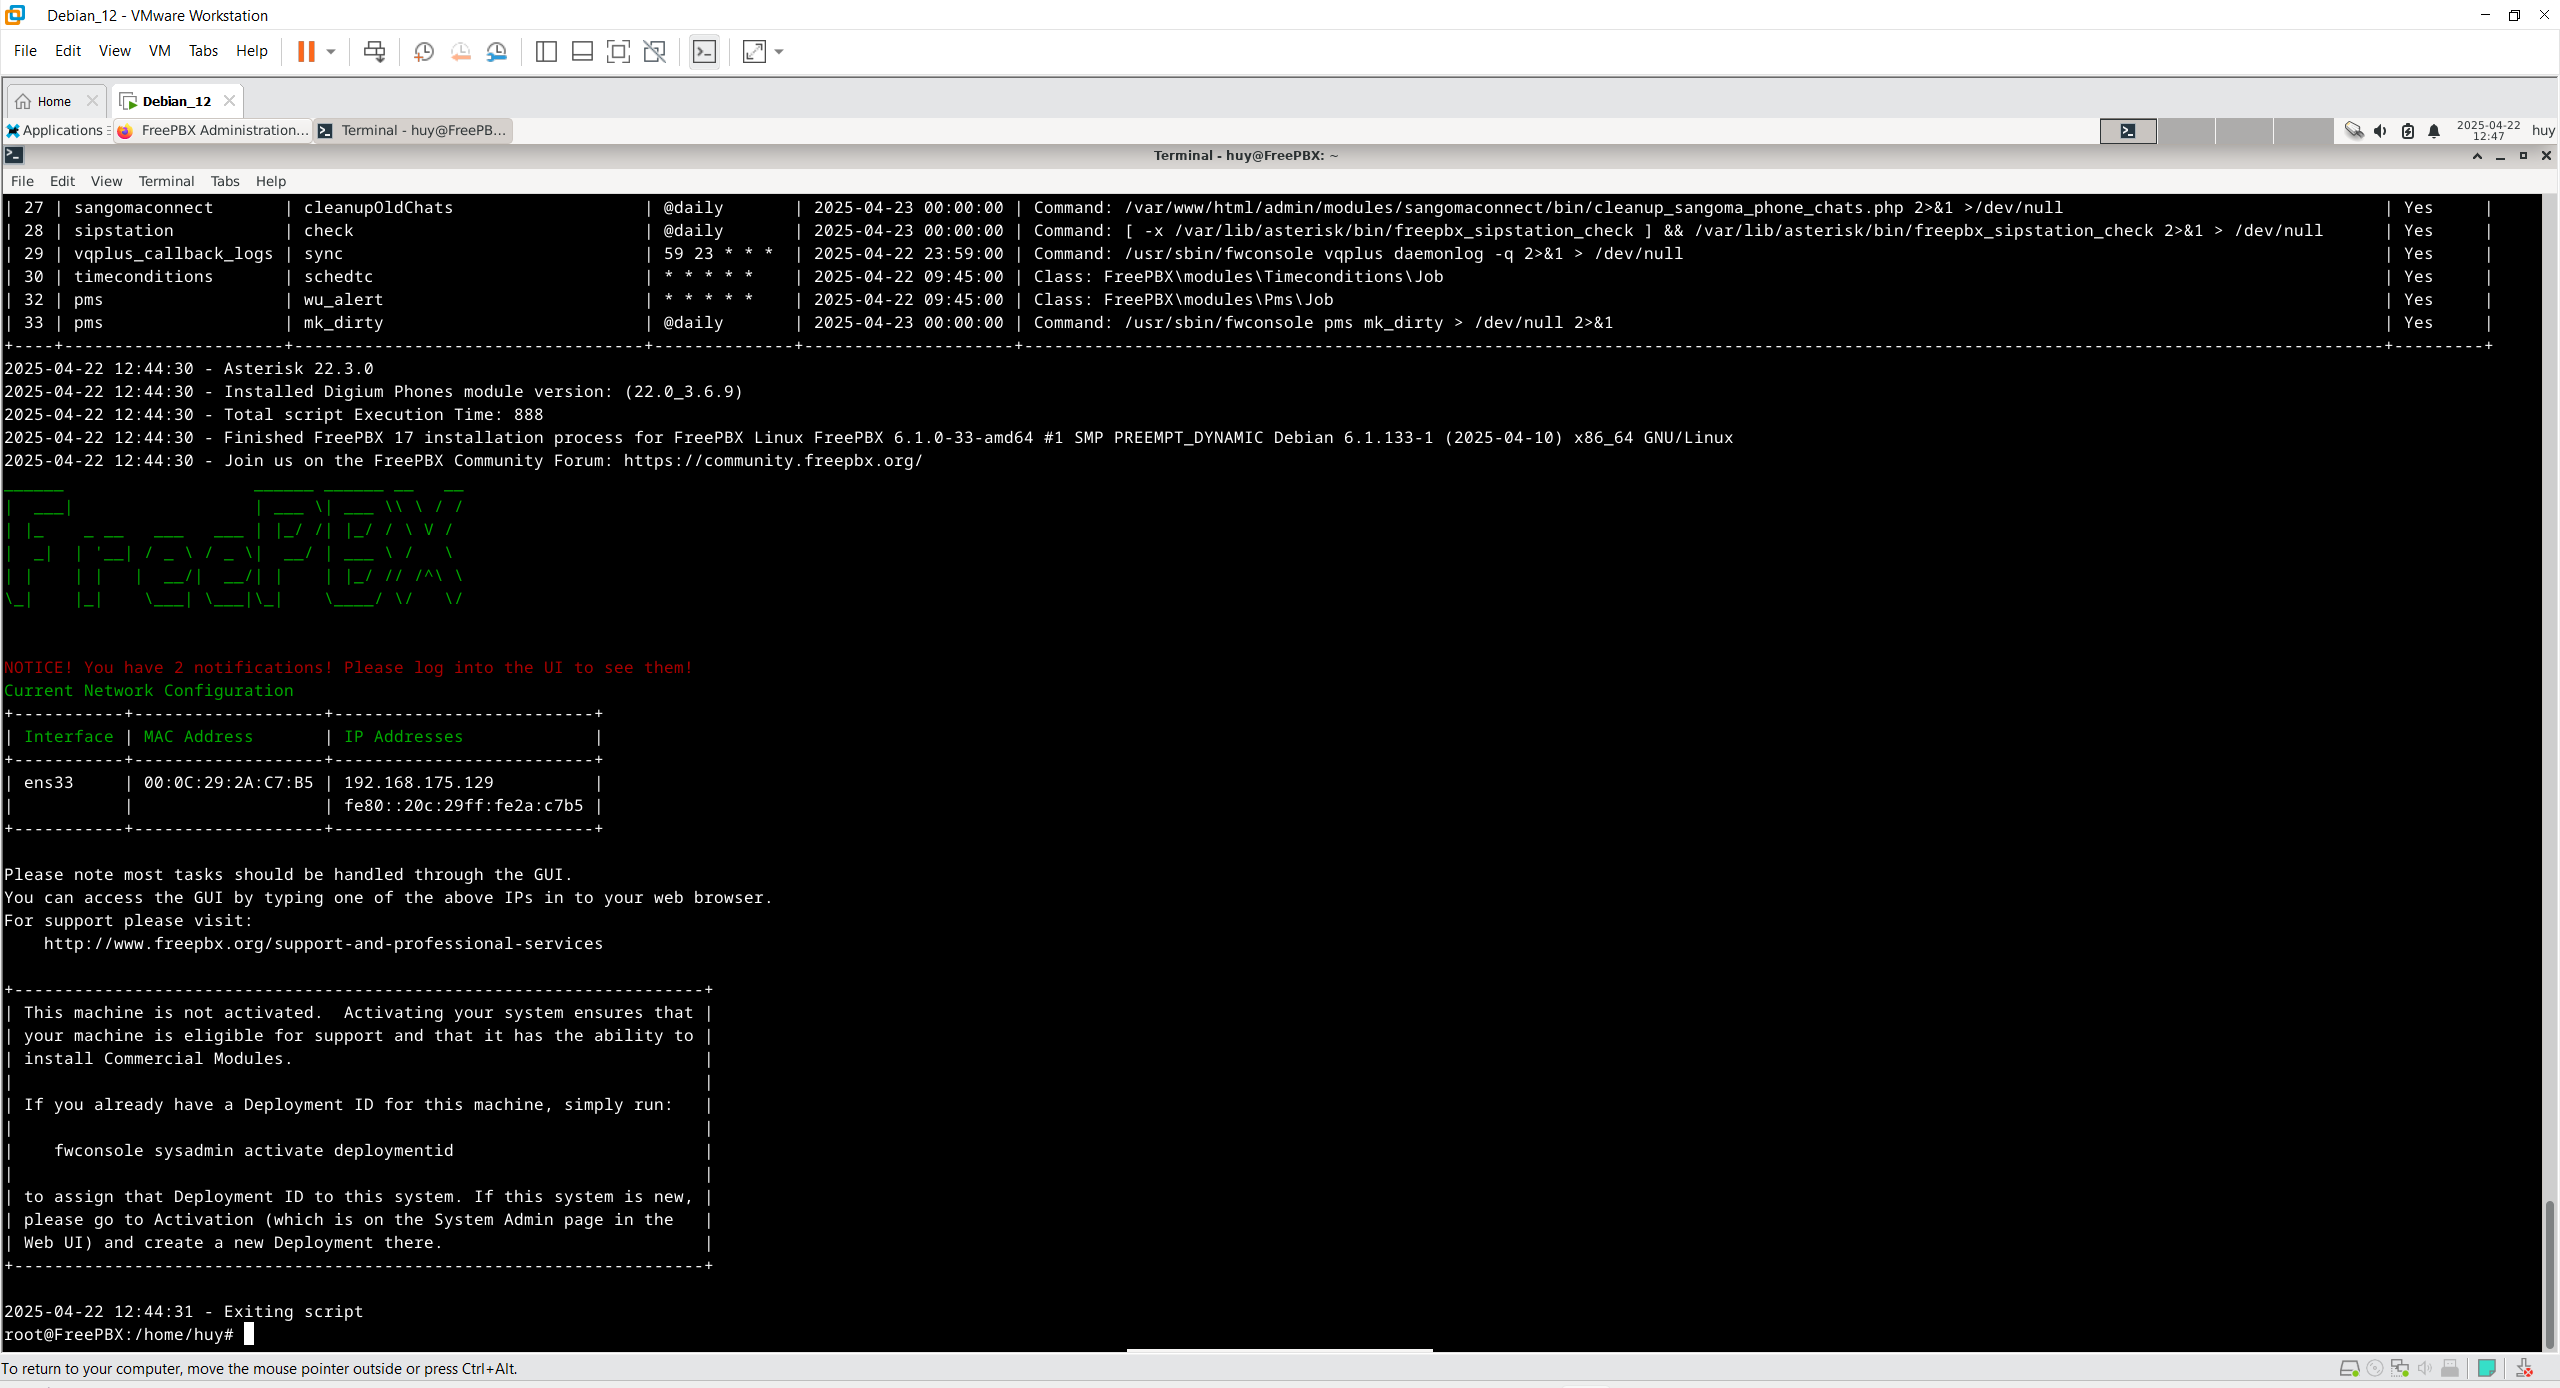 Figure 2: FreePBX installation
Post-Installation
After the installation is complete, you can access the FreePBX web interface by navigating to http://your-server-ip/admin in your web browser.
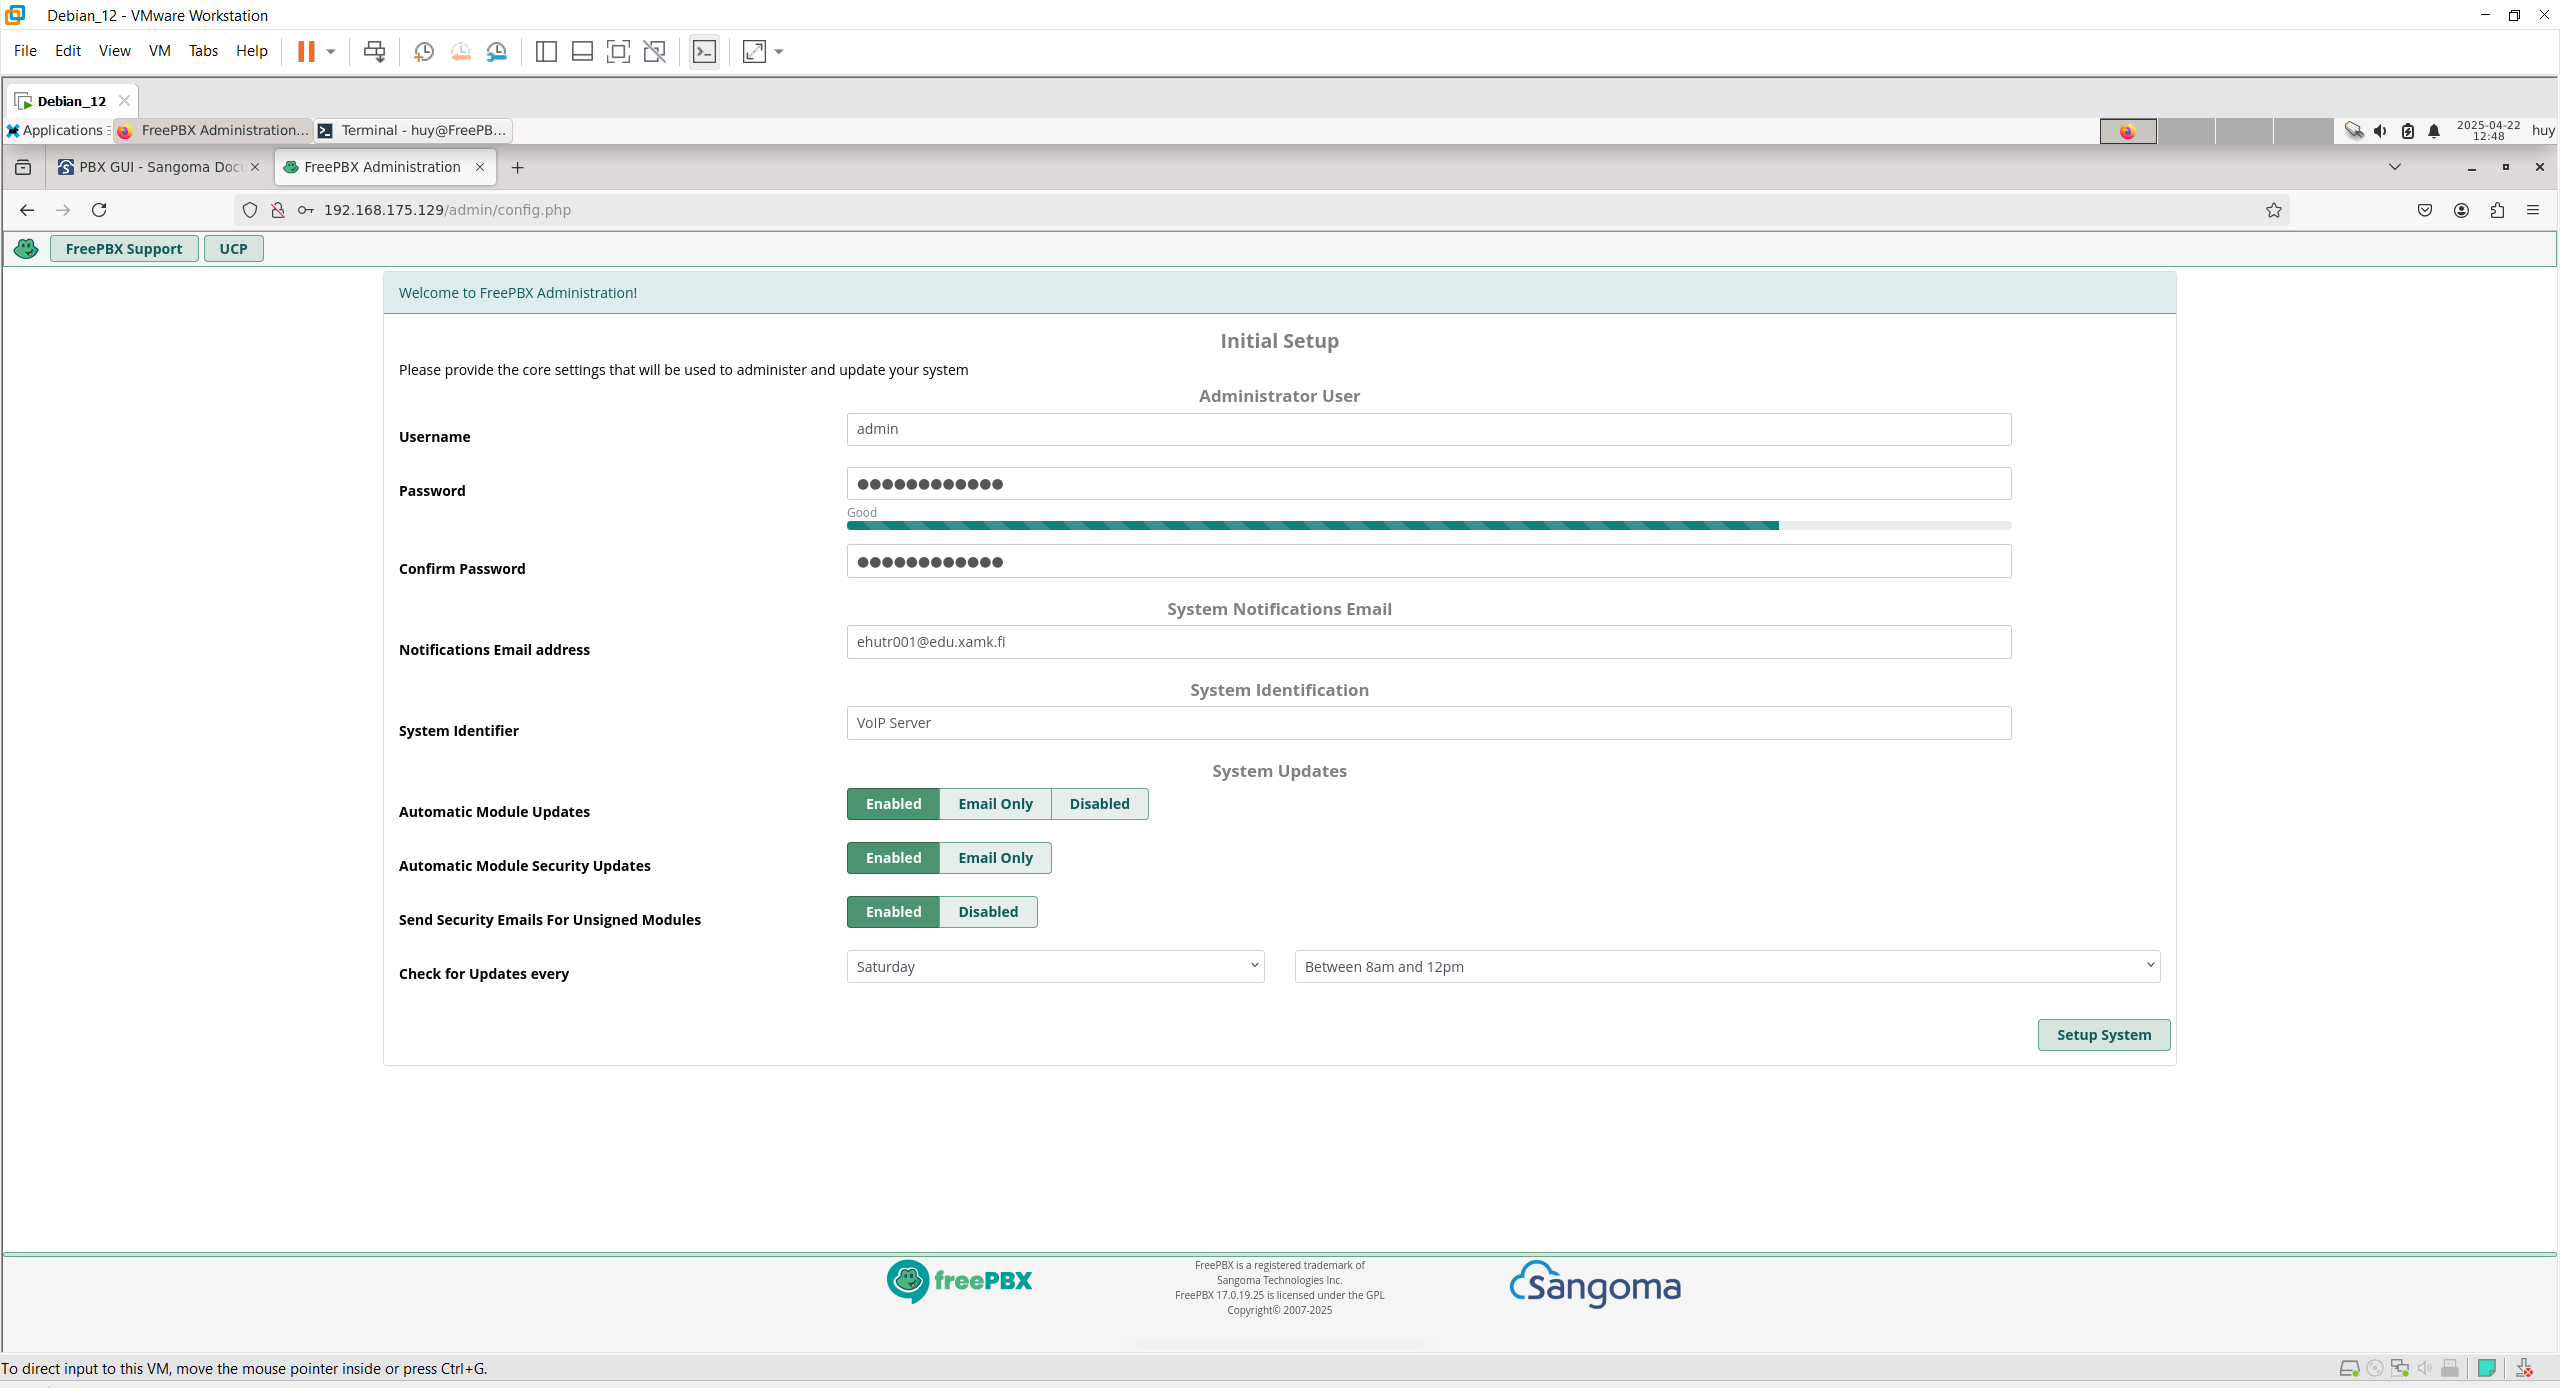 Figure 3: Initial Setup
At this point, FreePBX is up and running. User need to fill in the input in order to move forward. By the end of the setup, user can decided to activate the FreePBX or not.
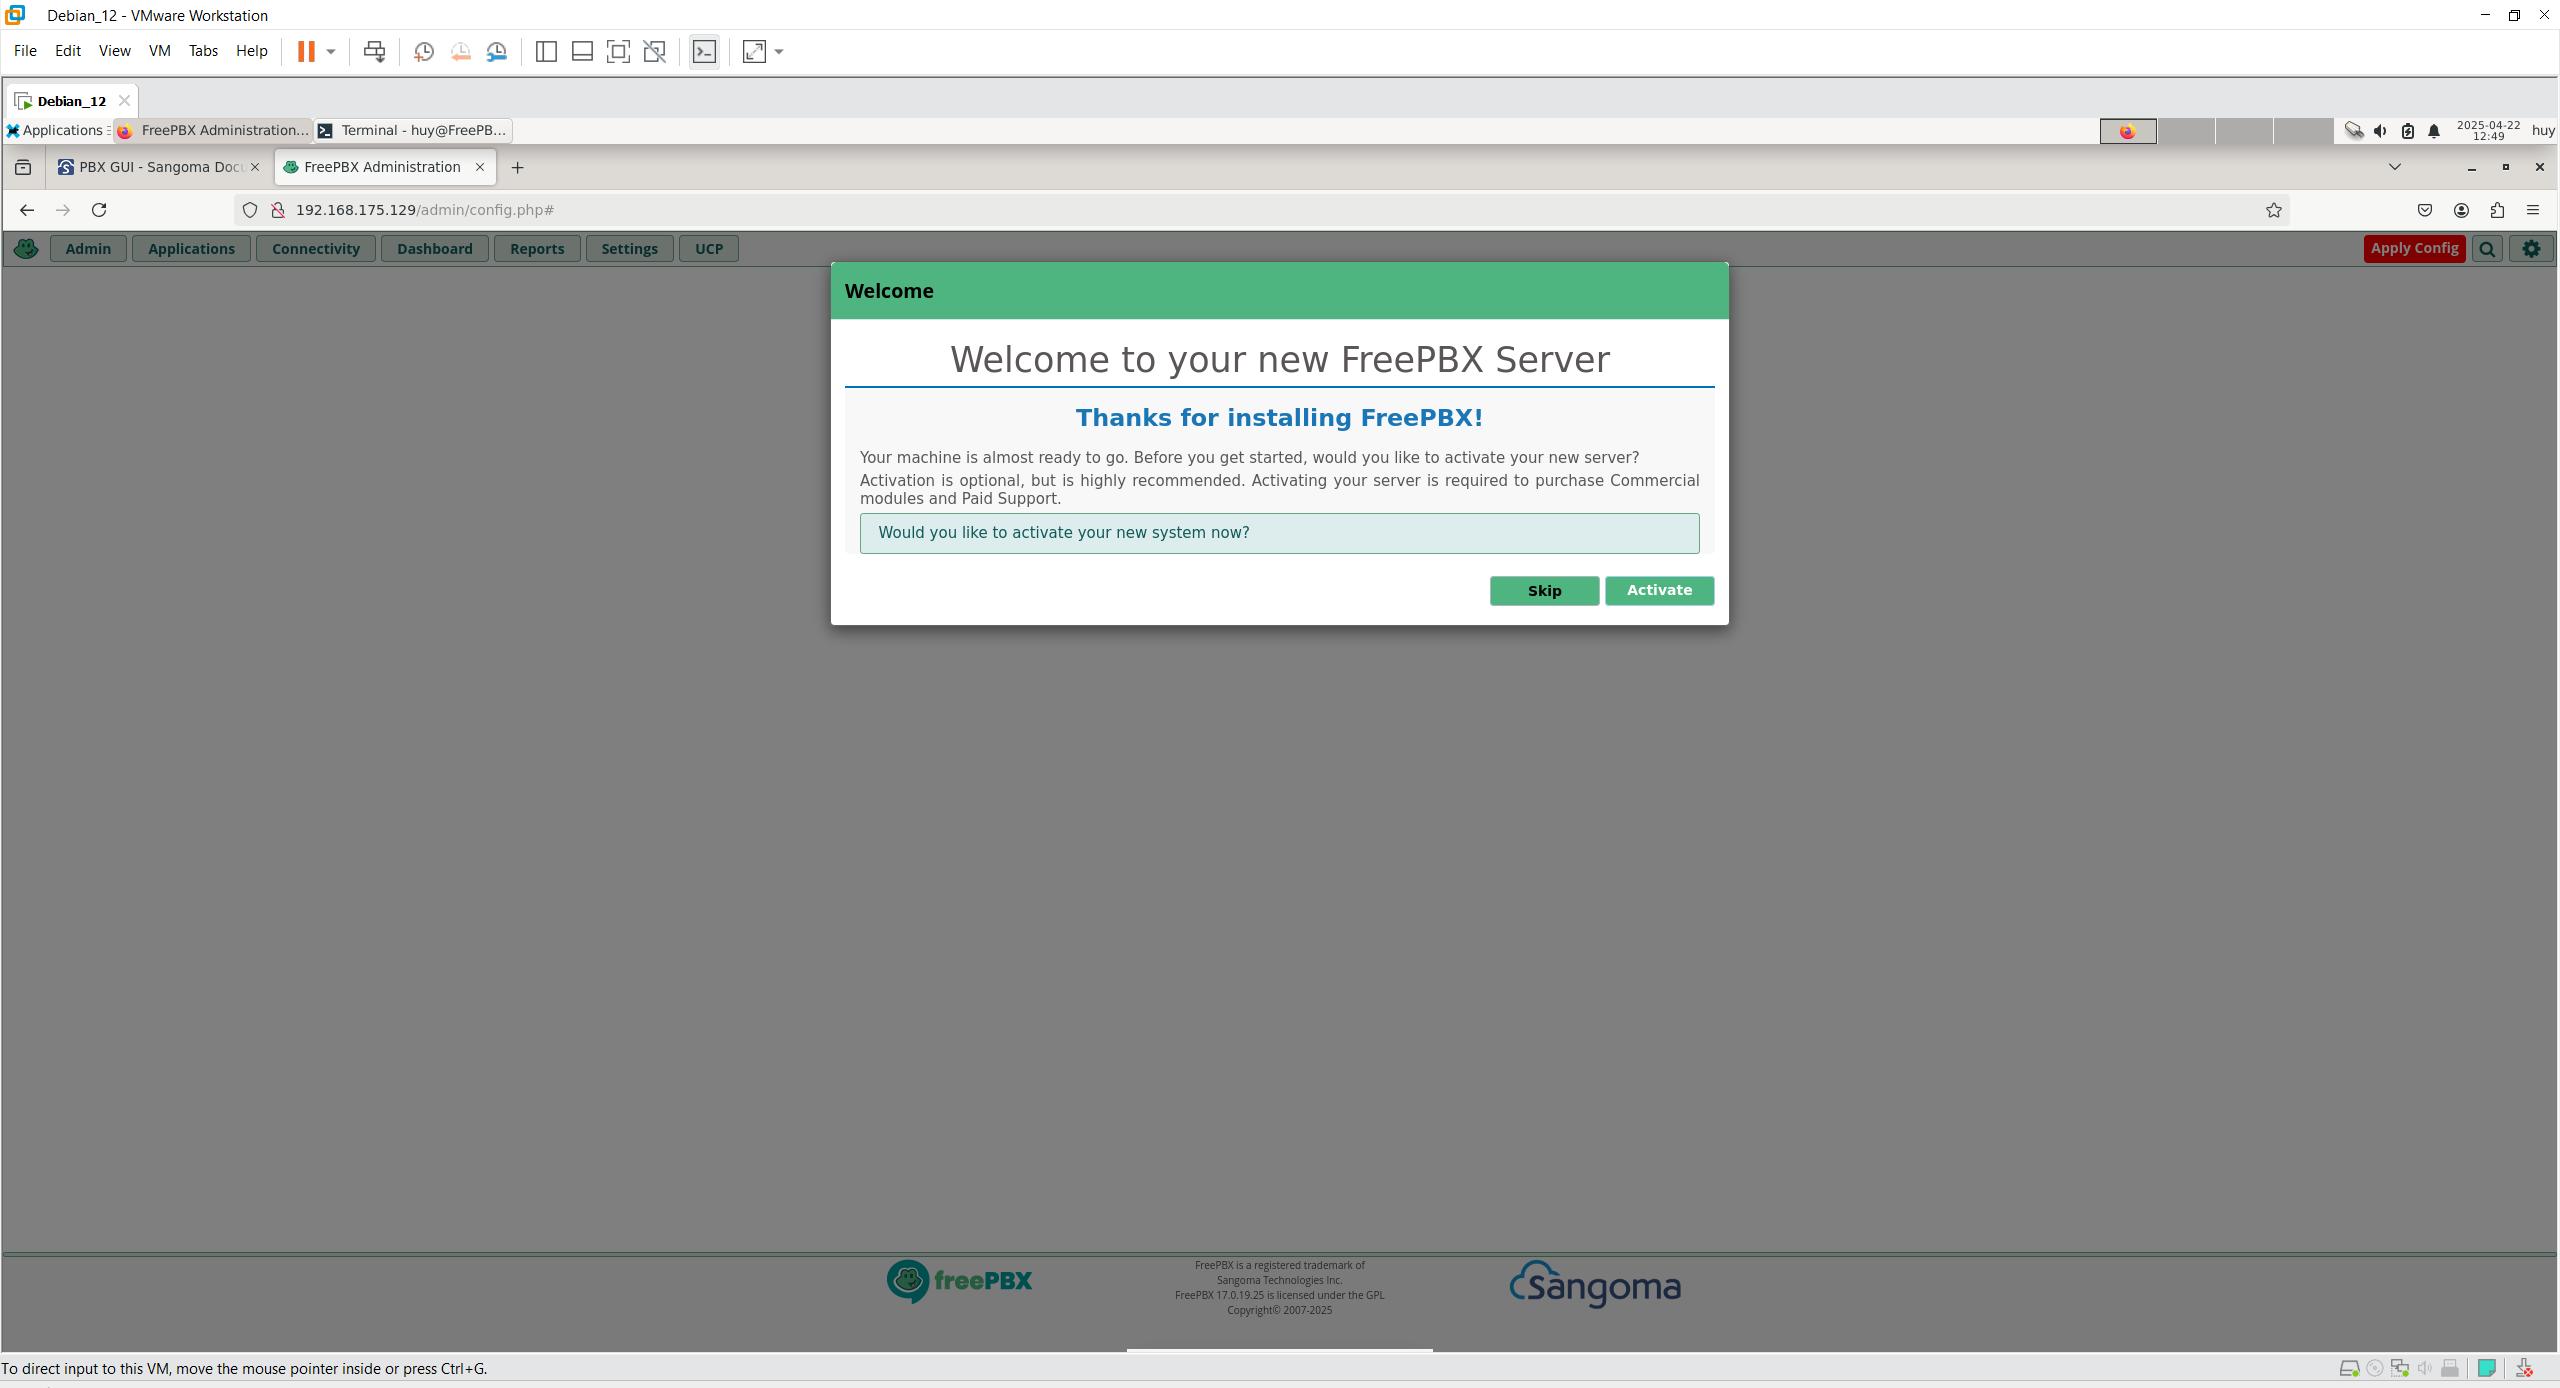 Figure 4: Activate FreePBX Server
Now the FreePBX server is activated. Check on the left panel, the System Overview section. It will show the status of the server.
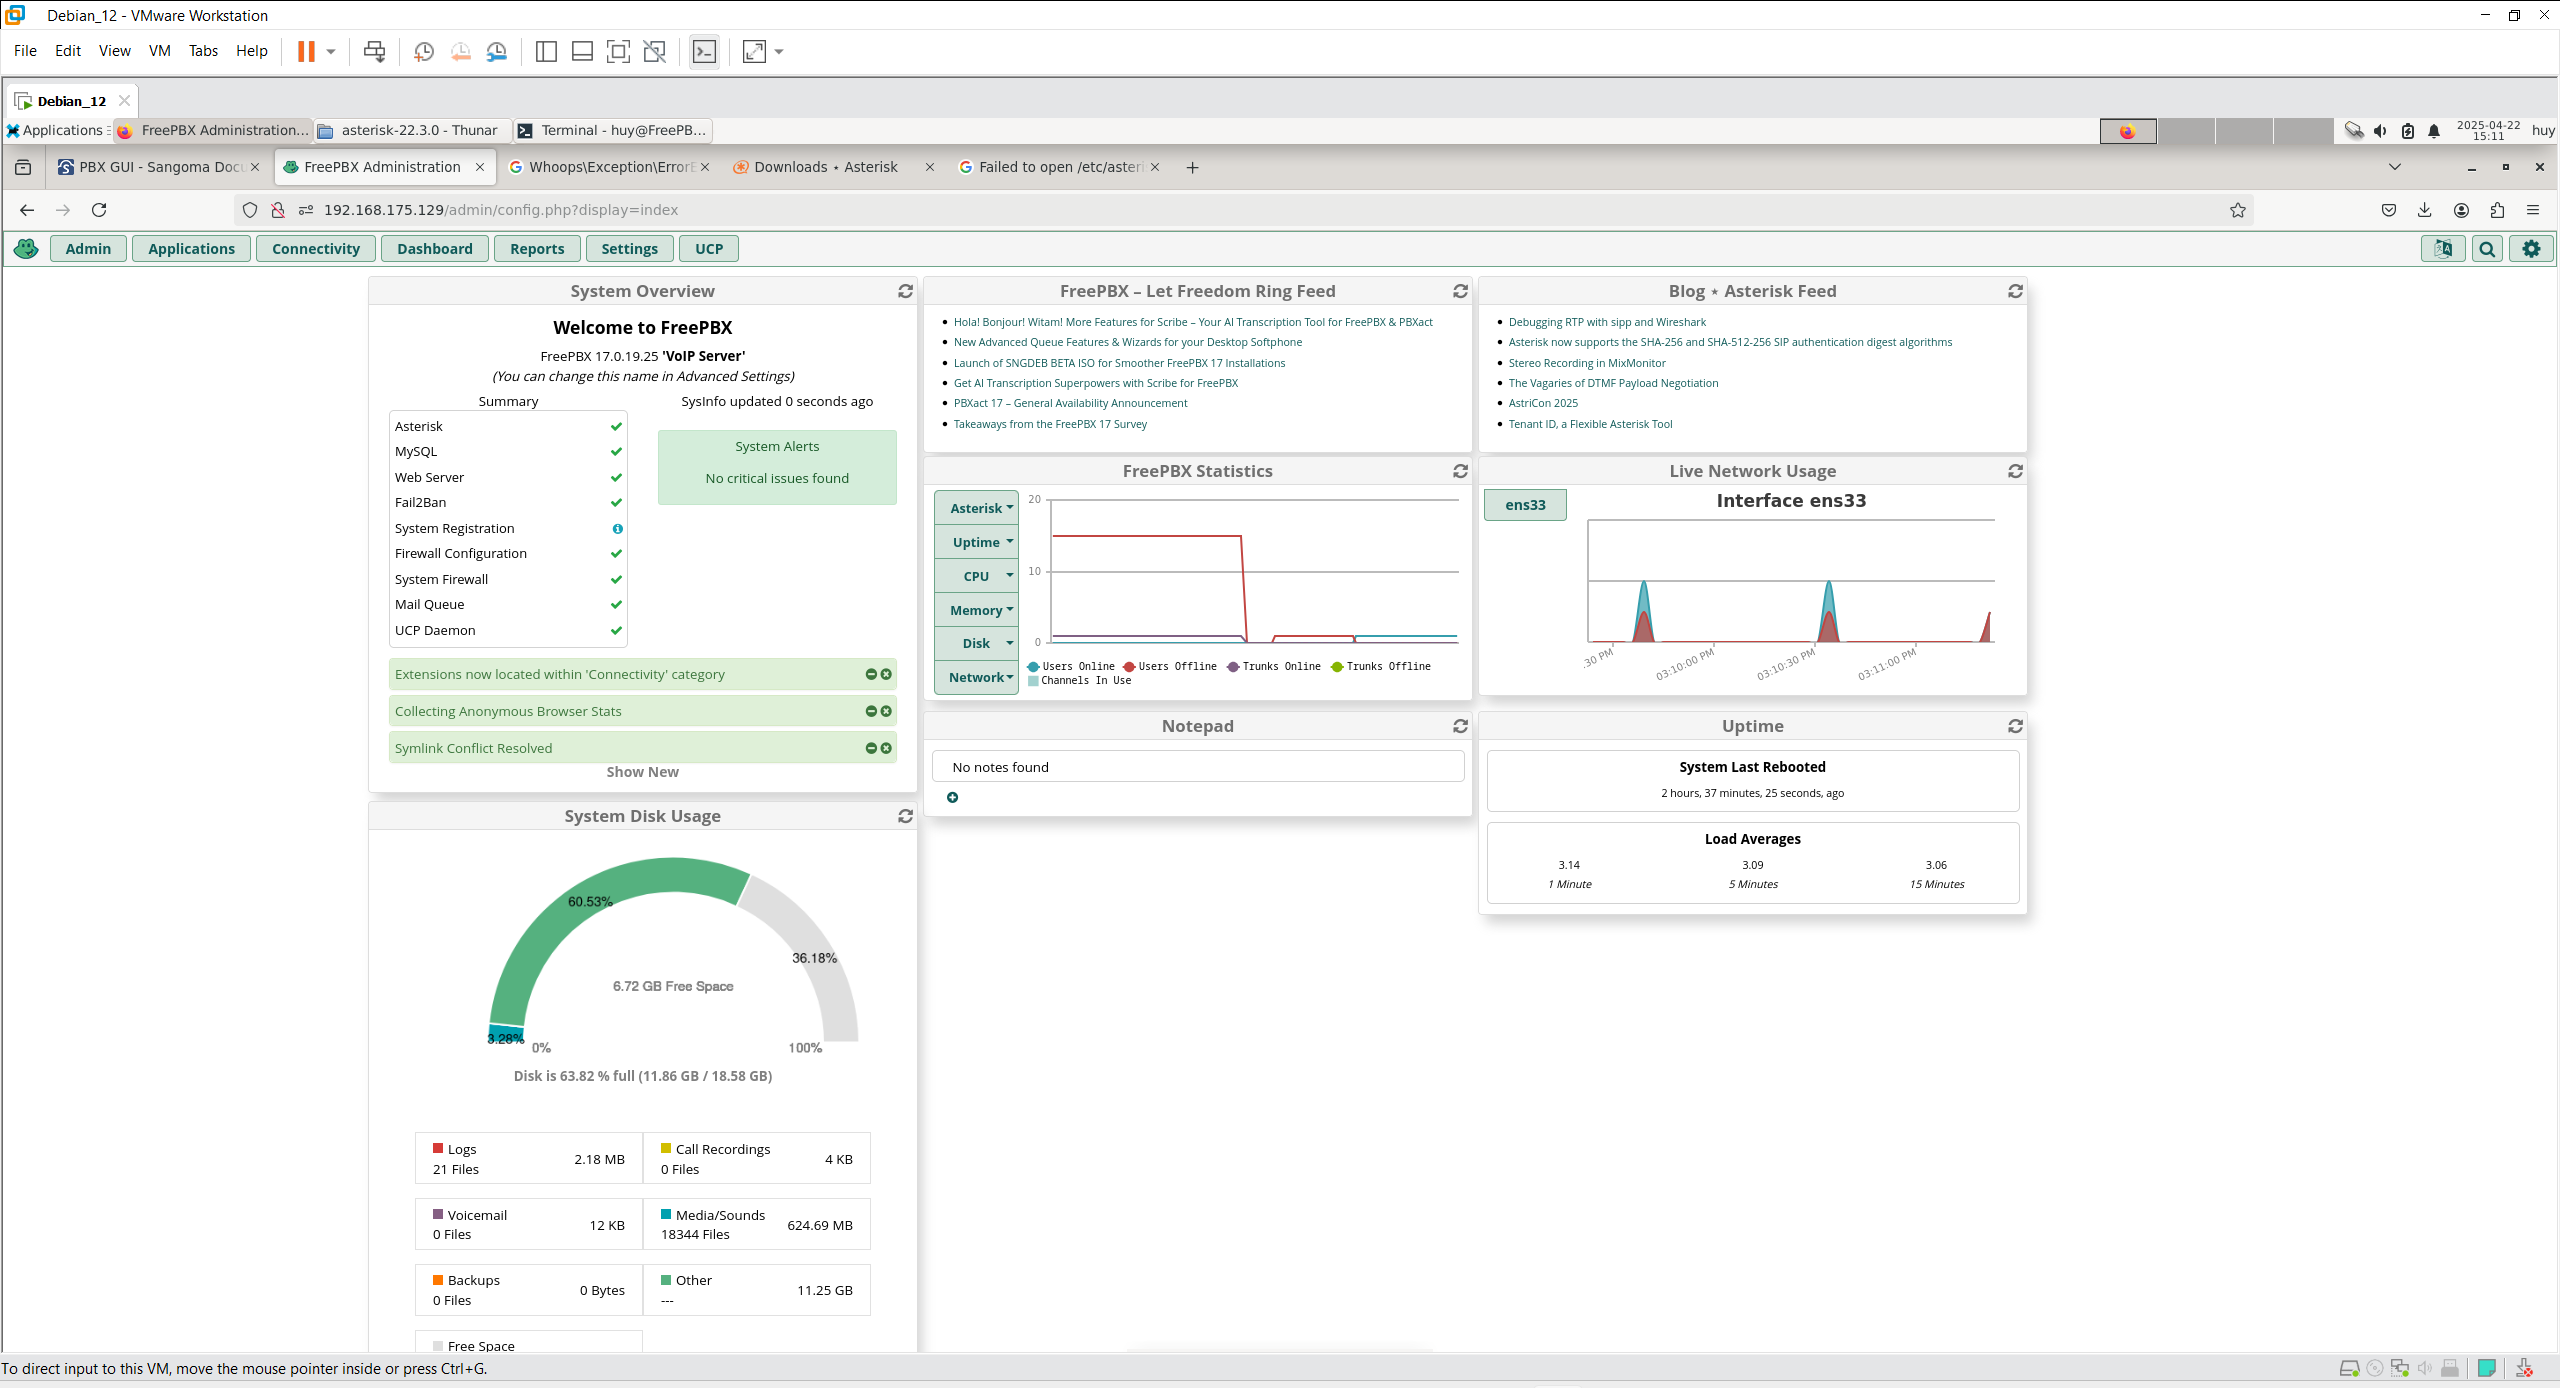 Figure 5: FreePBX Dashboard
Extensions Setup
In order to make a call, admin need to setup the extensions. Click Application -> Extensions on the left panel. Then click Add Extension button. Choose Generic SIP Device and fill in the required fields.
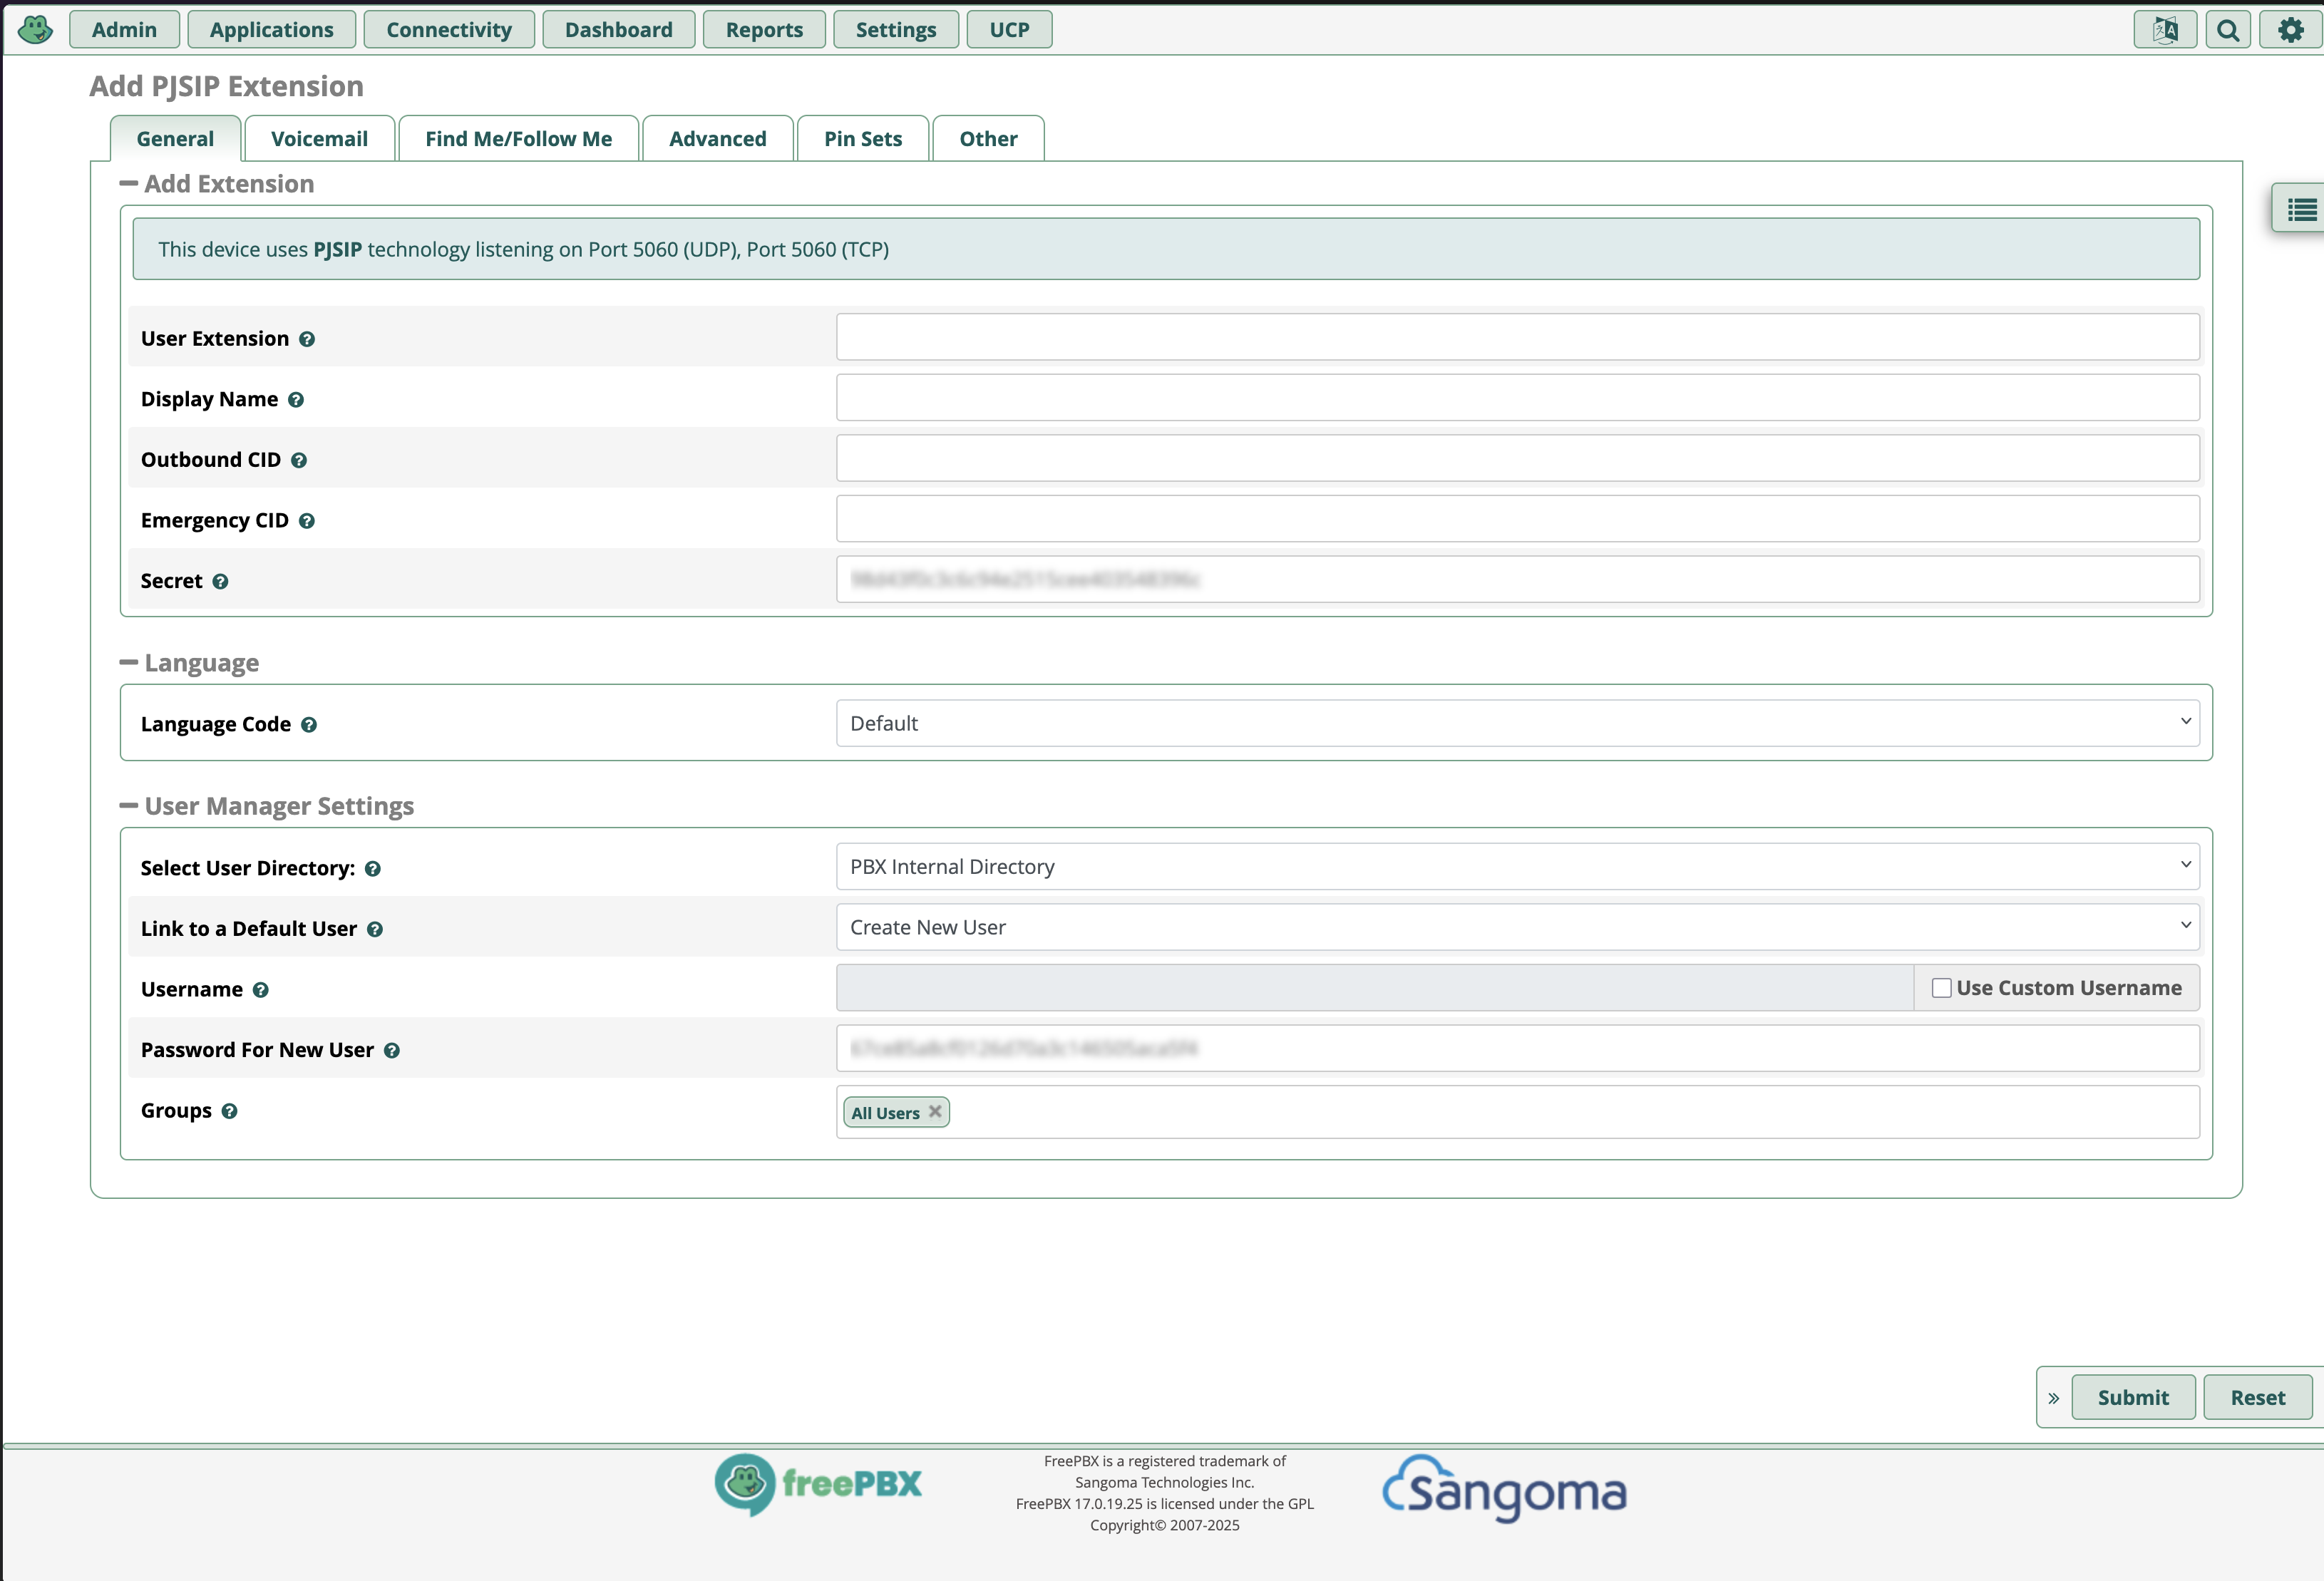 Figure 6: SIP setup
Remember the User Extension and Secret fields. They will be used to register the SIP device.
Registering SIP Device
On your SIP device (softphone or hardware phone), enter the following details:
- SIP Server: your-server-ip
- SIP User ID: User Extension from FreePBX
- SIP Password: Secret from FreePBX
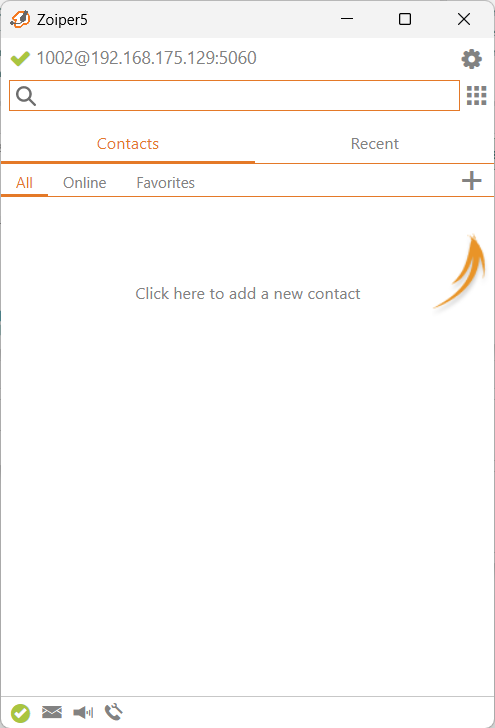 Figure 7: Zoiper on Windows
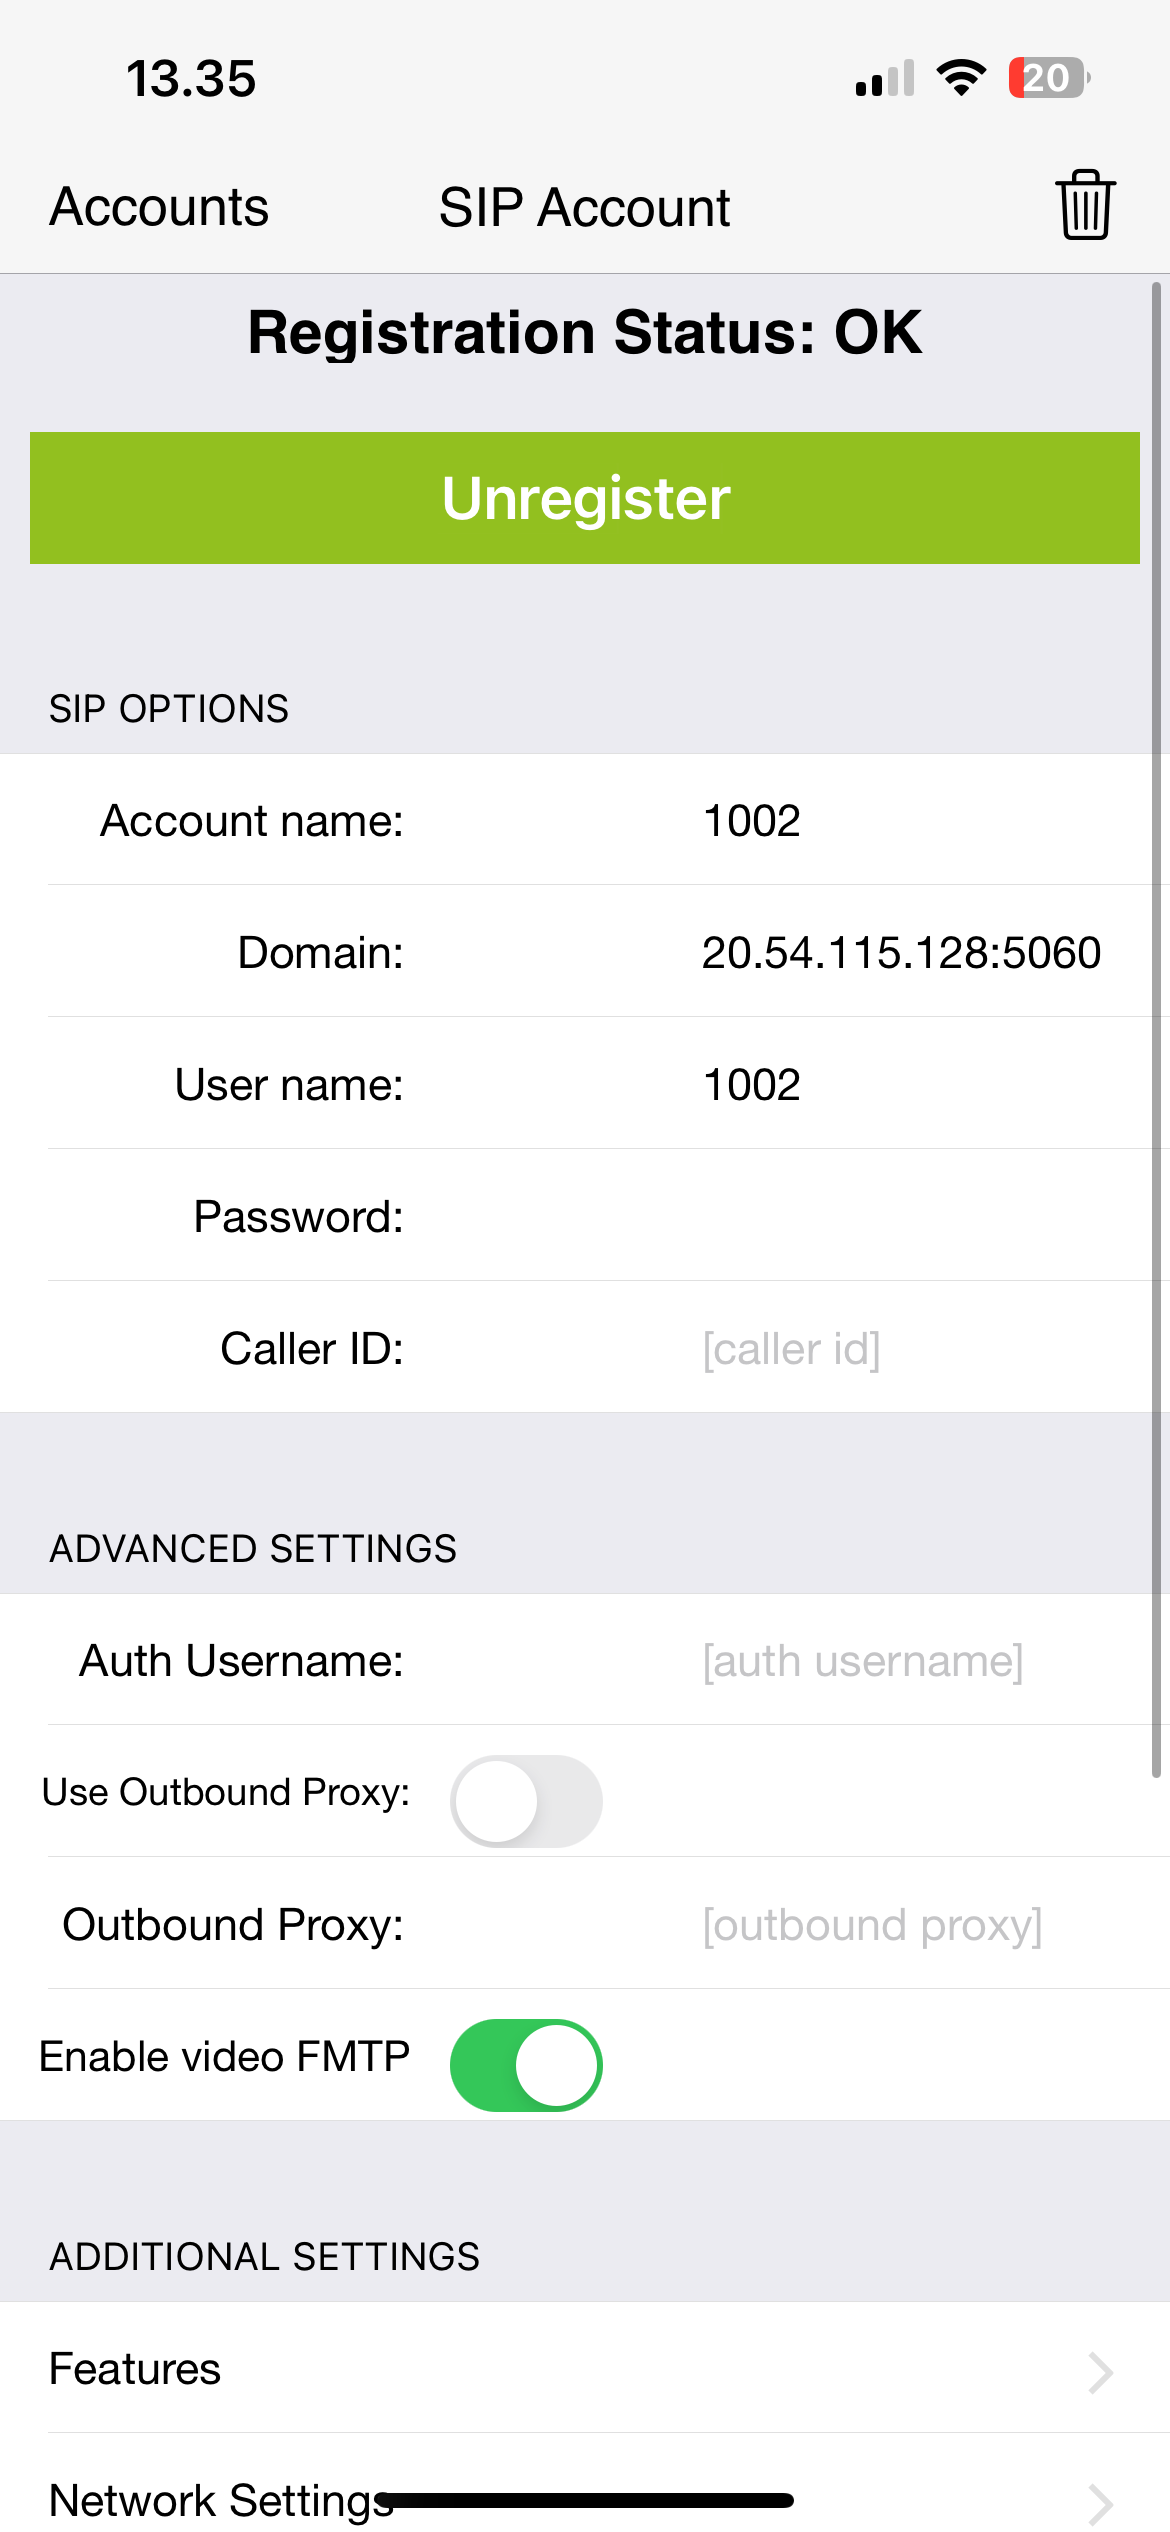 Figure 8: Zoiper on Iphone
Now you can make and receive calls using your SIP device. Enter the User Extension to call another extension or enter a phone number to make an external call.
Conclusion
This guide provided a basic setup for FreePBX and Asterisk on a Debian server. You can now explore the various features of FreePBX, such as call routing, voicemail, and more.