Preparation
This guide details the setup of Moodle on a virtual machine with the following specifications:
OS: Ubuntu Server 24.04 LTS
CPUs: 2
RAM: 4 GiB
A successful Moodle installation requires several core components to be operational beforehand:
- A web server, such as Apache, Nginx, or IIS.
- A database server, like PostgreSQL, MySQL, or MariaDB.
- A correctly installed and configured version of PHP.
For this setup, Microsoft Azure was used to provision the virtual machine and necessary infrastructure. However, due to the lack of a registered domain name for this specific setup, configuring Single Sign-On (SSO) methods like LDAP or Google OAuth was not possible, as these typically require verifiable domain ownership and DNS records.
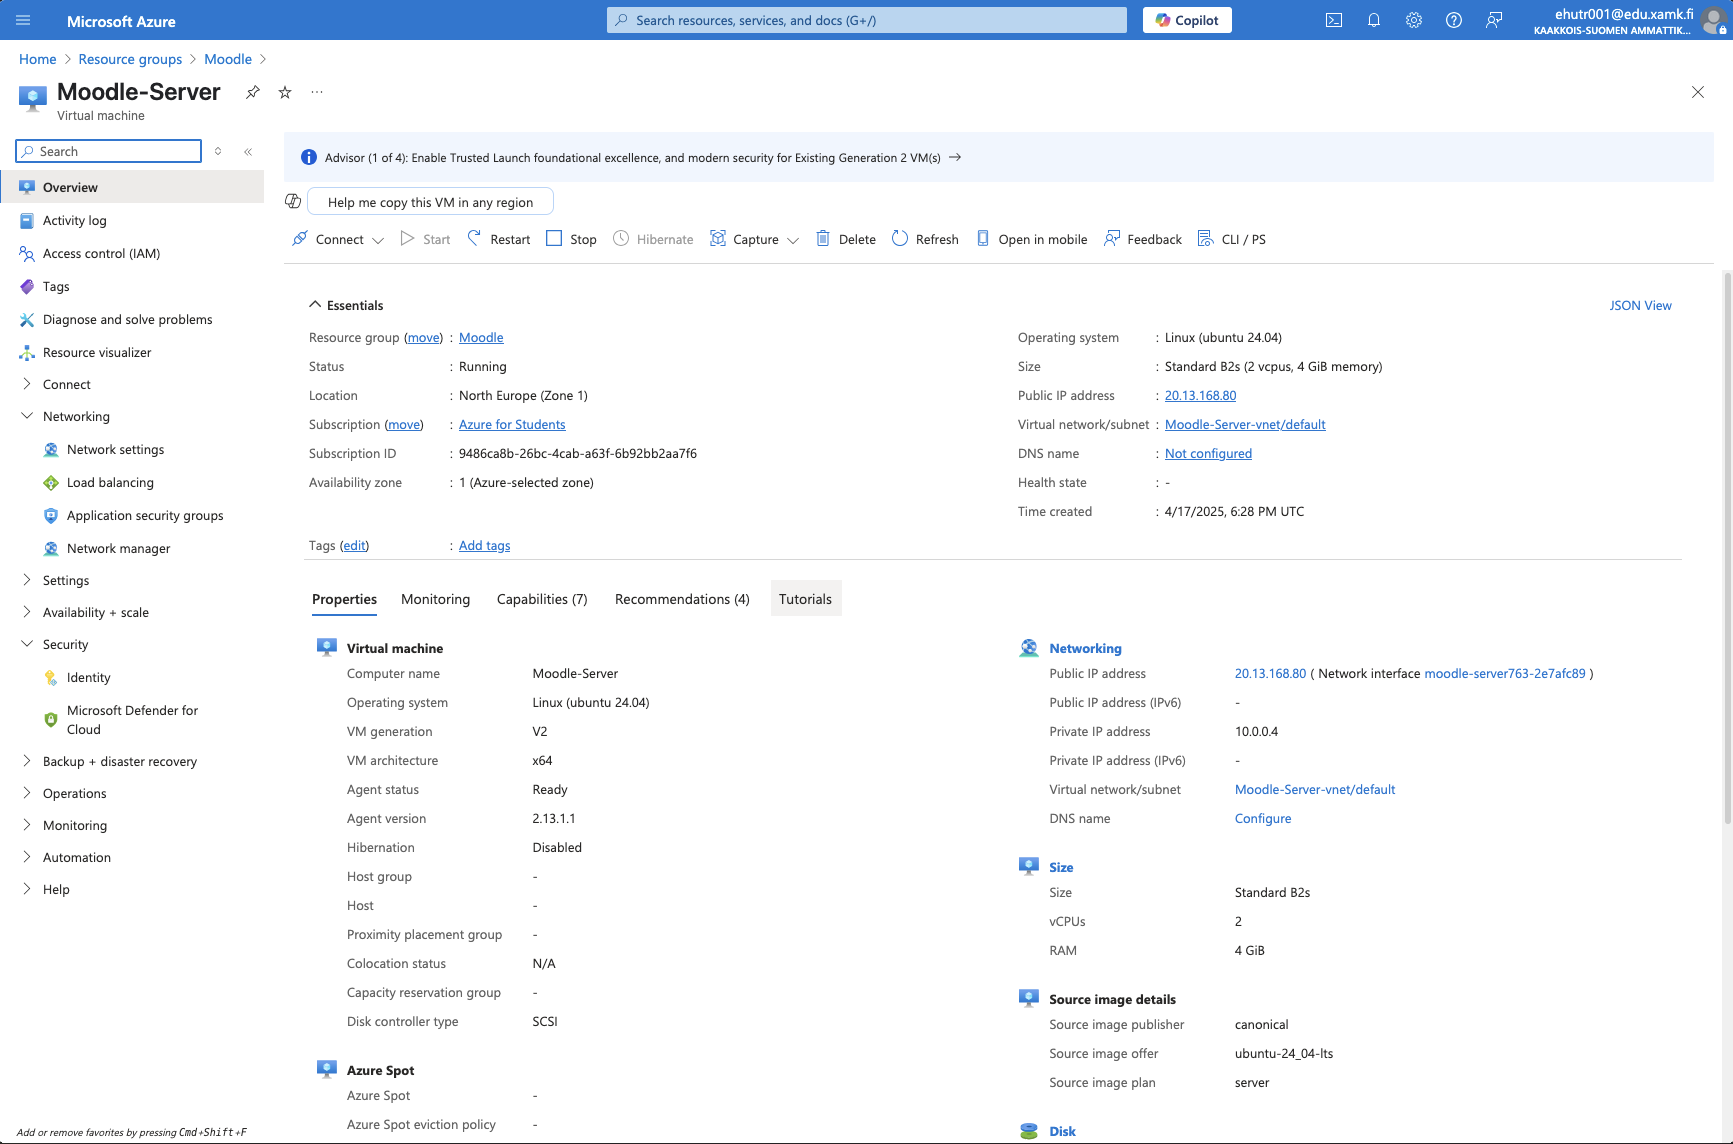
Azure VM Configuration
1. Install the LAMP Stack
Moodle relies on a standard web stack, often referred to as LAMP (Linux, Apache, MySQL/MariaDB, PHP). The specific requirements can be found in the Moodle 4.5 Server Requirements.
The following steps prepare the Ubuntu server by installing Apache, MariaDB, PHP, and other necessary dependencies:
- Update the package list and upgrade existing packages to their latest versions.
- Install Apache, PHP modules, MariaDB, and various utilities required by Moodle (like Git, Ghostscript, ClamAV, Certbot, UFW firewall tool, and Nano text editor) using the
apt-getpackage manager.
sudo apt-get update && sudo apt upgrade -y
sudo apt-get -y install apache2 php libapache2-mod-php php-mysql graphviz aspell git clamav php-pspell php-curl php-gd php-intl ghostscript php-xml php-xmlrpc php-ldap php-zip php-soap php-mbstring unzip mariadb-server mariadb-client certbot python3-certbot-apache ufw nano
2. Download Moodle Code via Git
Using Git (a version control system) is the recommended method for obtaining the Moodle source code. It simplifies the initial download and makes future updates and patching significantly easier.
The following commands will download the Moodle 4.0.5 stable release:
- Navigate to the web server’s root directory (
/var/www/html). - Clone the official Moodle repository from GitHub into a new
moodledirectory. - Change into the newly created
moodledirectory. - Check out the specific stable branch for Moodle 4.0.5 (
MOODLE_405_STABLE). - Configure Git to use fast-forward merges only when pulling updates, which helps maintain a clean history.
cd /var/www/html
sudo git clone https://github.com/moodle/moodle.git
cd moodle
sudo git checkout origin/MOODLE_405_STABLE
sudo git config pull.ff only
3. Configure Moodle Directories and PHP Settings
Moodle requires a dedicated data directory (moodledata) located outside the publicly accessible web root for security. Additionally, certain PHP configuration settings need adjustment, and a scheduled task (cron job) must be set up for background processes.
The commands below perform these essential configuration steps:
- Create the
moodledatadirectory. - Set the ownership of the
moodledatadirectory to the web server user (www-data). - Apply strict permissions to the
moodledatadirectory (read/write/execute for owner only) and files within it (read/write for owner only). - Set appropriate ownership for the Moodle code directory (
/var/www/html/moodle). - Increase PHP’s
max_input_vars,post_max_size, andupload_max_filesizesettings in both the Apache and CLI configuration files to accommodate Moodle’s requirements. - Add a cron job for the
www-datauser to execute Moodle’s cron script (admin/cli/cron.php) every minute.
sudo mkdir -p /var/www/moodledata
sudo chown -R www-data:www-data /var/www/moodledata
sudo find /var/www/moodledata -type d -exec chmod 700 {} \;
sudo find /var/www/moodledata -type f -exec chmod 600 {} \;
sudo chown -R www-data:www-data /var/www/html/moodle
sudo sed -i 's/.*max_input_vars =.*/max_input_vars = 5000/' /etc/php/8.3/apache2/php.ini
sudo sed -i 's/.*max_input_vars =.*/max_input_vars = 5000/' /etc/php/8.3/cli/php.ini
sudo sed -i 's/.*post_max_size =.*/post_max_size = 256M/' /etc/php/8.3/apache2/php.ini
sudo sed -i 's/.*post_max_size =.*/post_max_size = 256M/' /etc/php/8.3/cli/php.ini
sudo sed -i 's/.*upload_max_filesize =.*/upload_max_filesize = 256M/' /etc/php/8.3/apache2/php.ini
sudo sed -i 's/.*upload_max_filesize =.*/upload_max_filesize = 256M/' /etc/php/8.3/cli/php.ini
echo "* * * * * /usr/bin/php /var/www/html/moodle/admin/cli/cron.php >/dev/null" | crontab -u www-data -
4. Create the Moodle Database and User
Moodle needs its own database and a dedicated database user with specific privileges.
These commands set up the MariaDB database:
- Generate a secure, random password for the Moodle database user.
- Create the
moodledatabase using the recommendedutf8mb4character set and collation. - Create the
moodleuserdatabase user, identified by the generated password, allowing connections only fromlocalhost. - Grant the necessary database privileges (SELECT, INSERT, UPDATE, DELETE, etc.) on the
moodledatabase tomoodleuser. - Display the generated password, which is required during the web-based installation. Make sure to record this password securely.
MYSQL_MOODLEUSER_PASSWORD=$(openssl rand -base64 6)
sudo mysql -e "CREATE DATABASE moodle DEFAULT CHARACTER SET utf8mb4 COLLATE utf8mb4_unicode_ci;"
sudo mysql -e "CREATE USER 'moodleuser'@'localhost' IDENTIFIED BY '$MYSQL_MOODLEUSER_PASSWORD';"
sudo mysql -e "GRANT SELECT, INSERT, UPDATE, DELETE, CREATE, CREATE TEMPORARY TABLES, DROP, INDEX, ALTER ON moodle.* TO 'moodleuser'@'localhost';"
echo "Your Moodle user password is $MYSQL_MOODLEUSER_PASSWORD. Write this down as you will need it in a web browser install"
5. Complete Installation via Web Interface
A script in the moodle/admin directory will complete the Moodle installation.
- Go to your domain/moodle on a web browser and use the web browser to complete the moodle install.
| prompt | Required |
|---|---|
| Web Address | http://your_web_address/moodle |
| Moodle Directory | /var/www/html/moodle |
| Data Directory | /var/www/moodledata |
| Database type | mariadb |
| Database host | localhost |
| Database name | moodle |
| Database user | moodleuser |
| Database password | Created in step 4r |
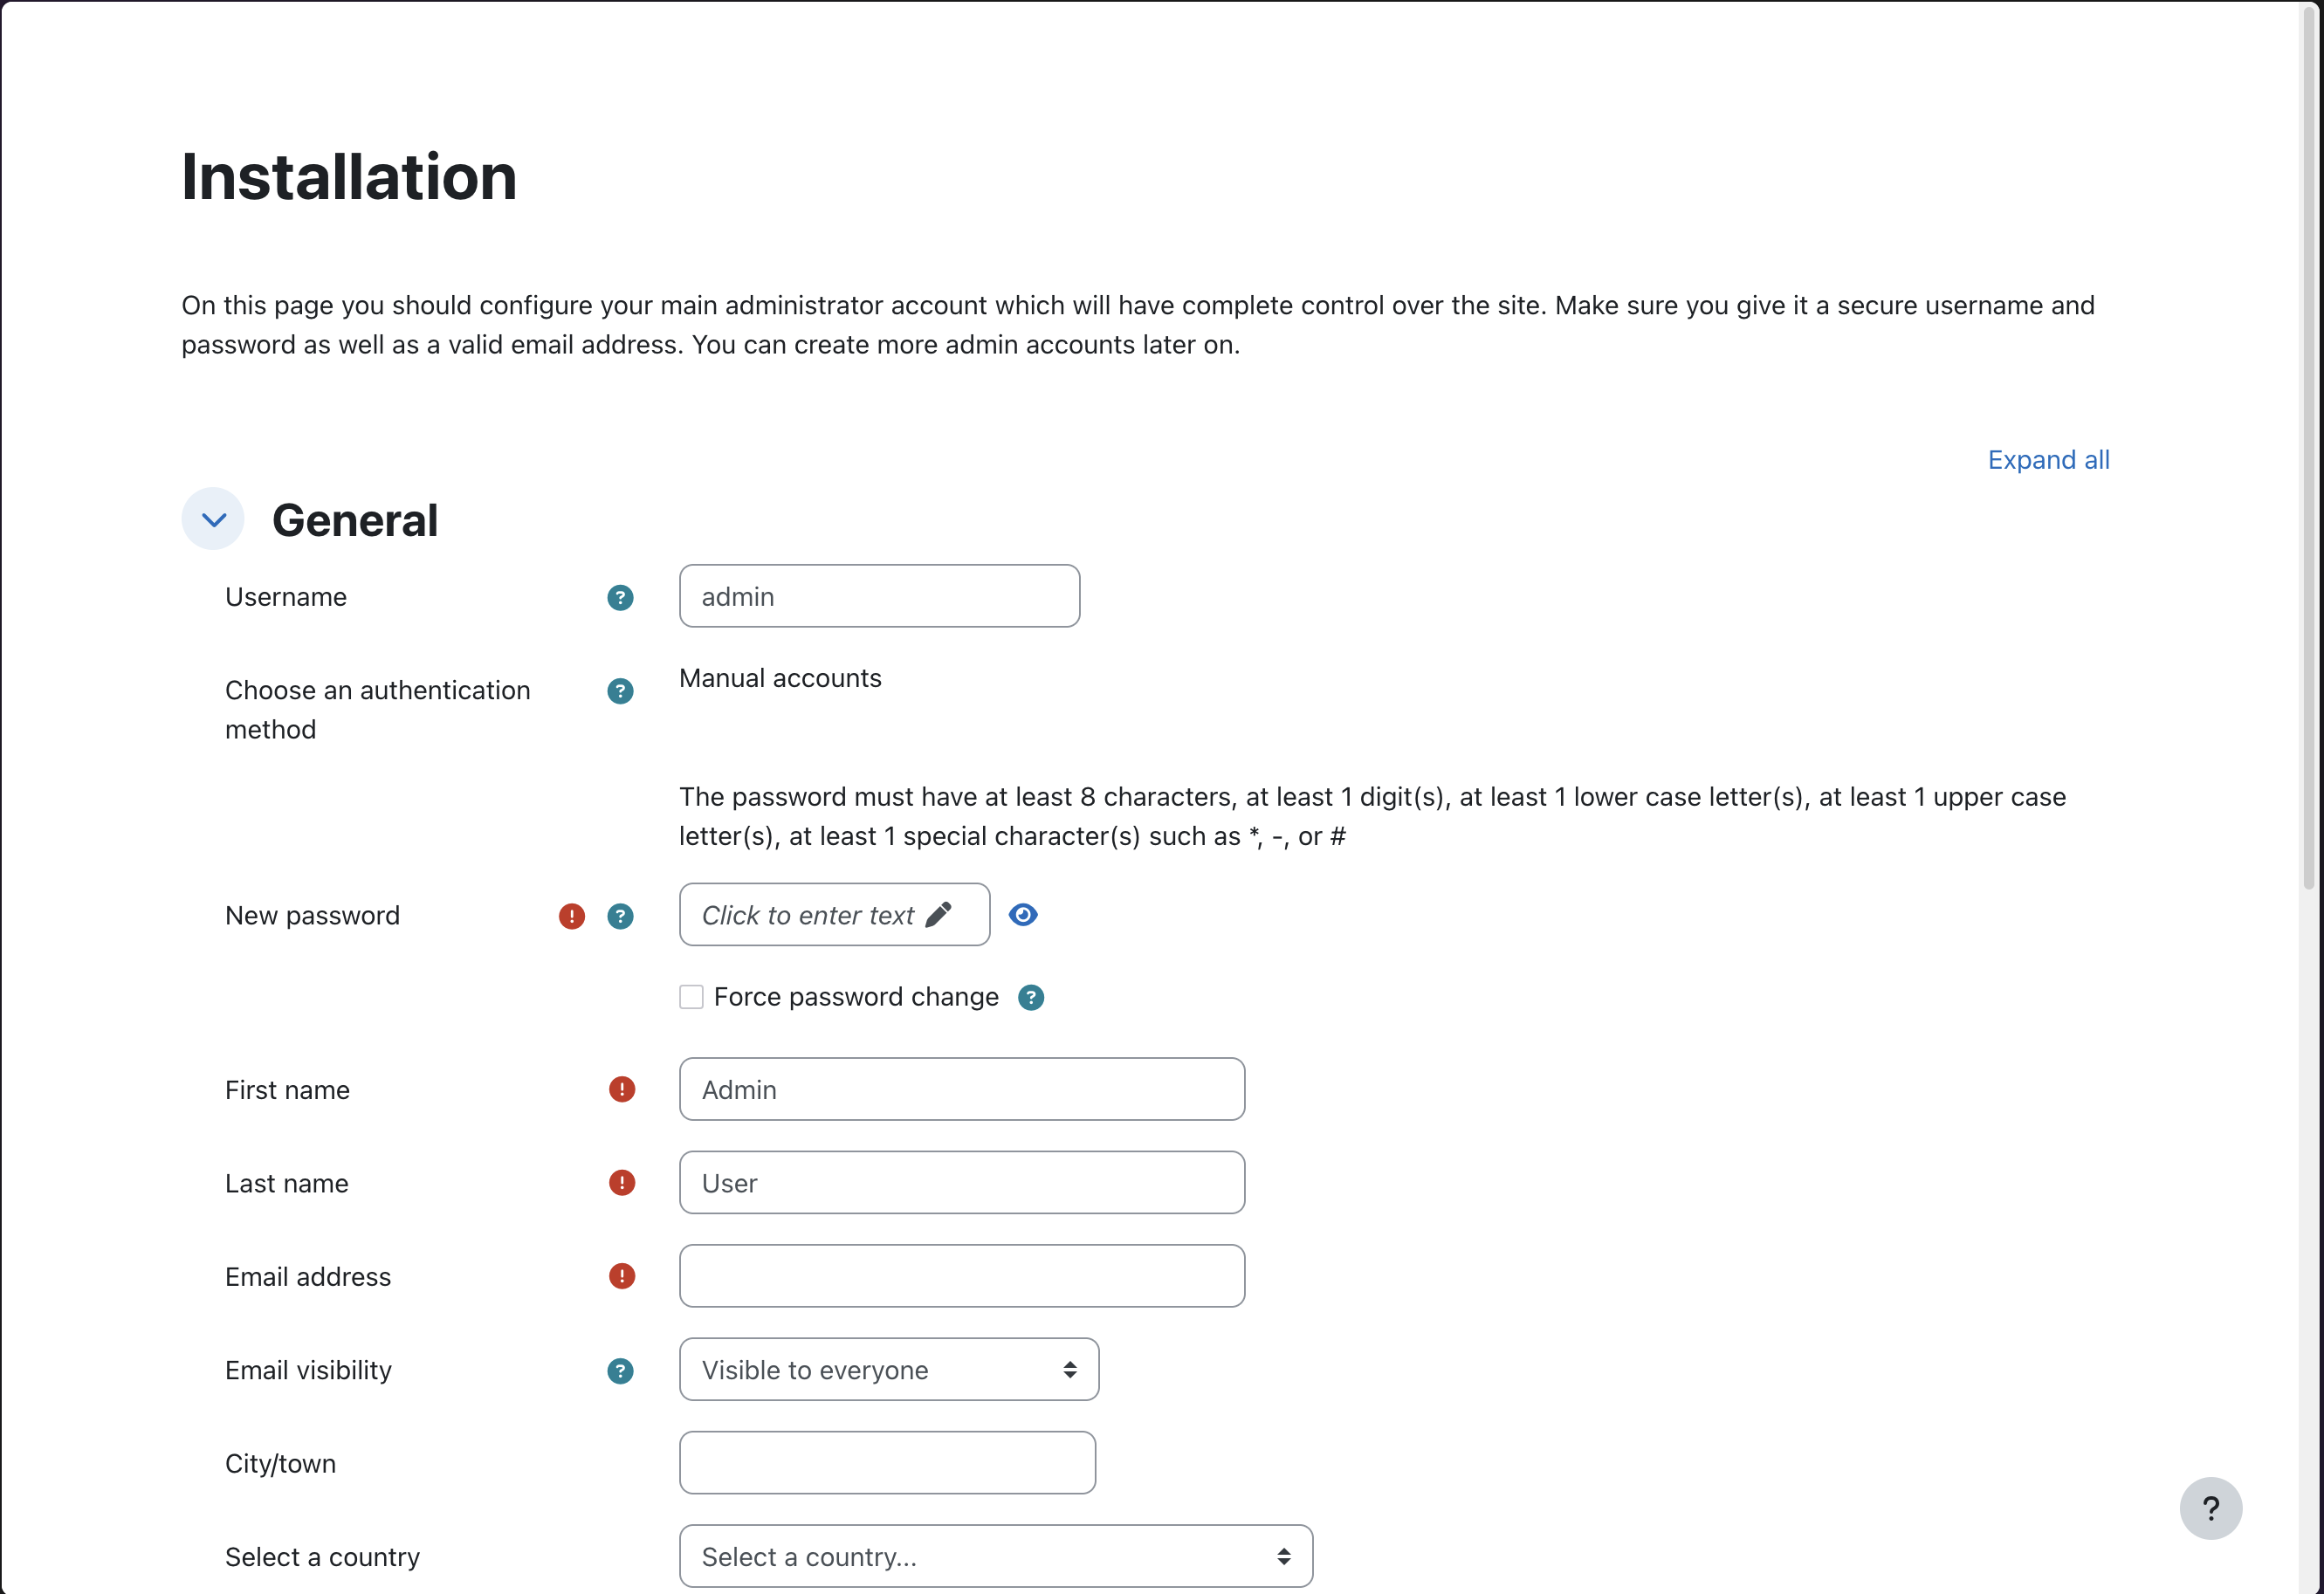
Required information for browser based installs
Initial Web Installation Screen
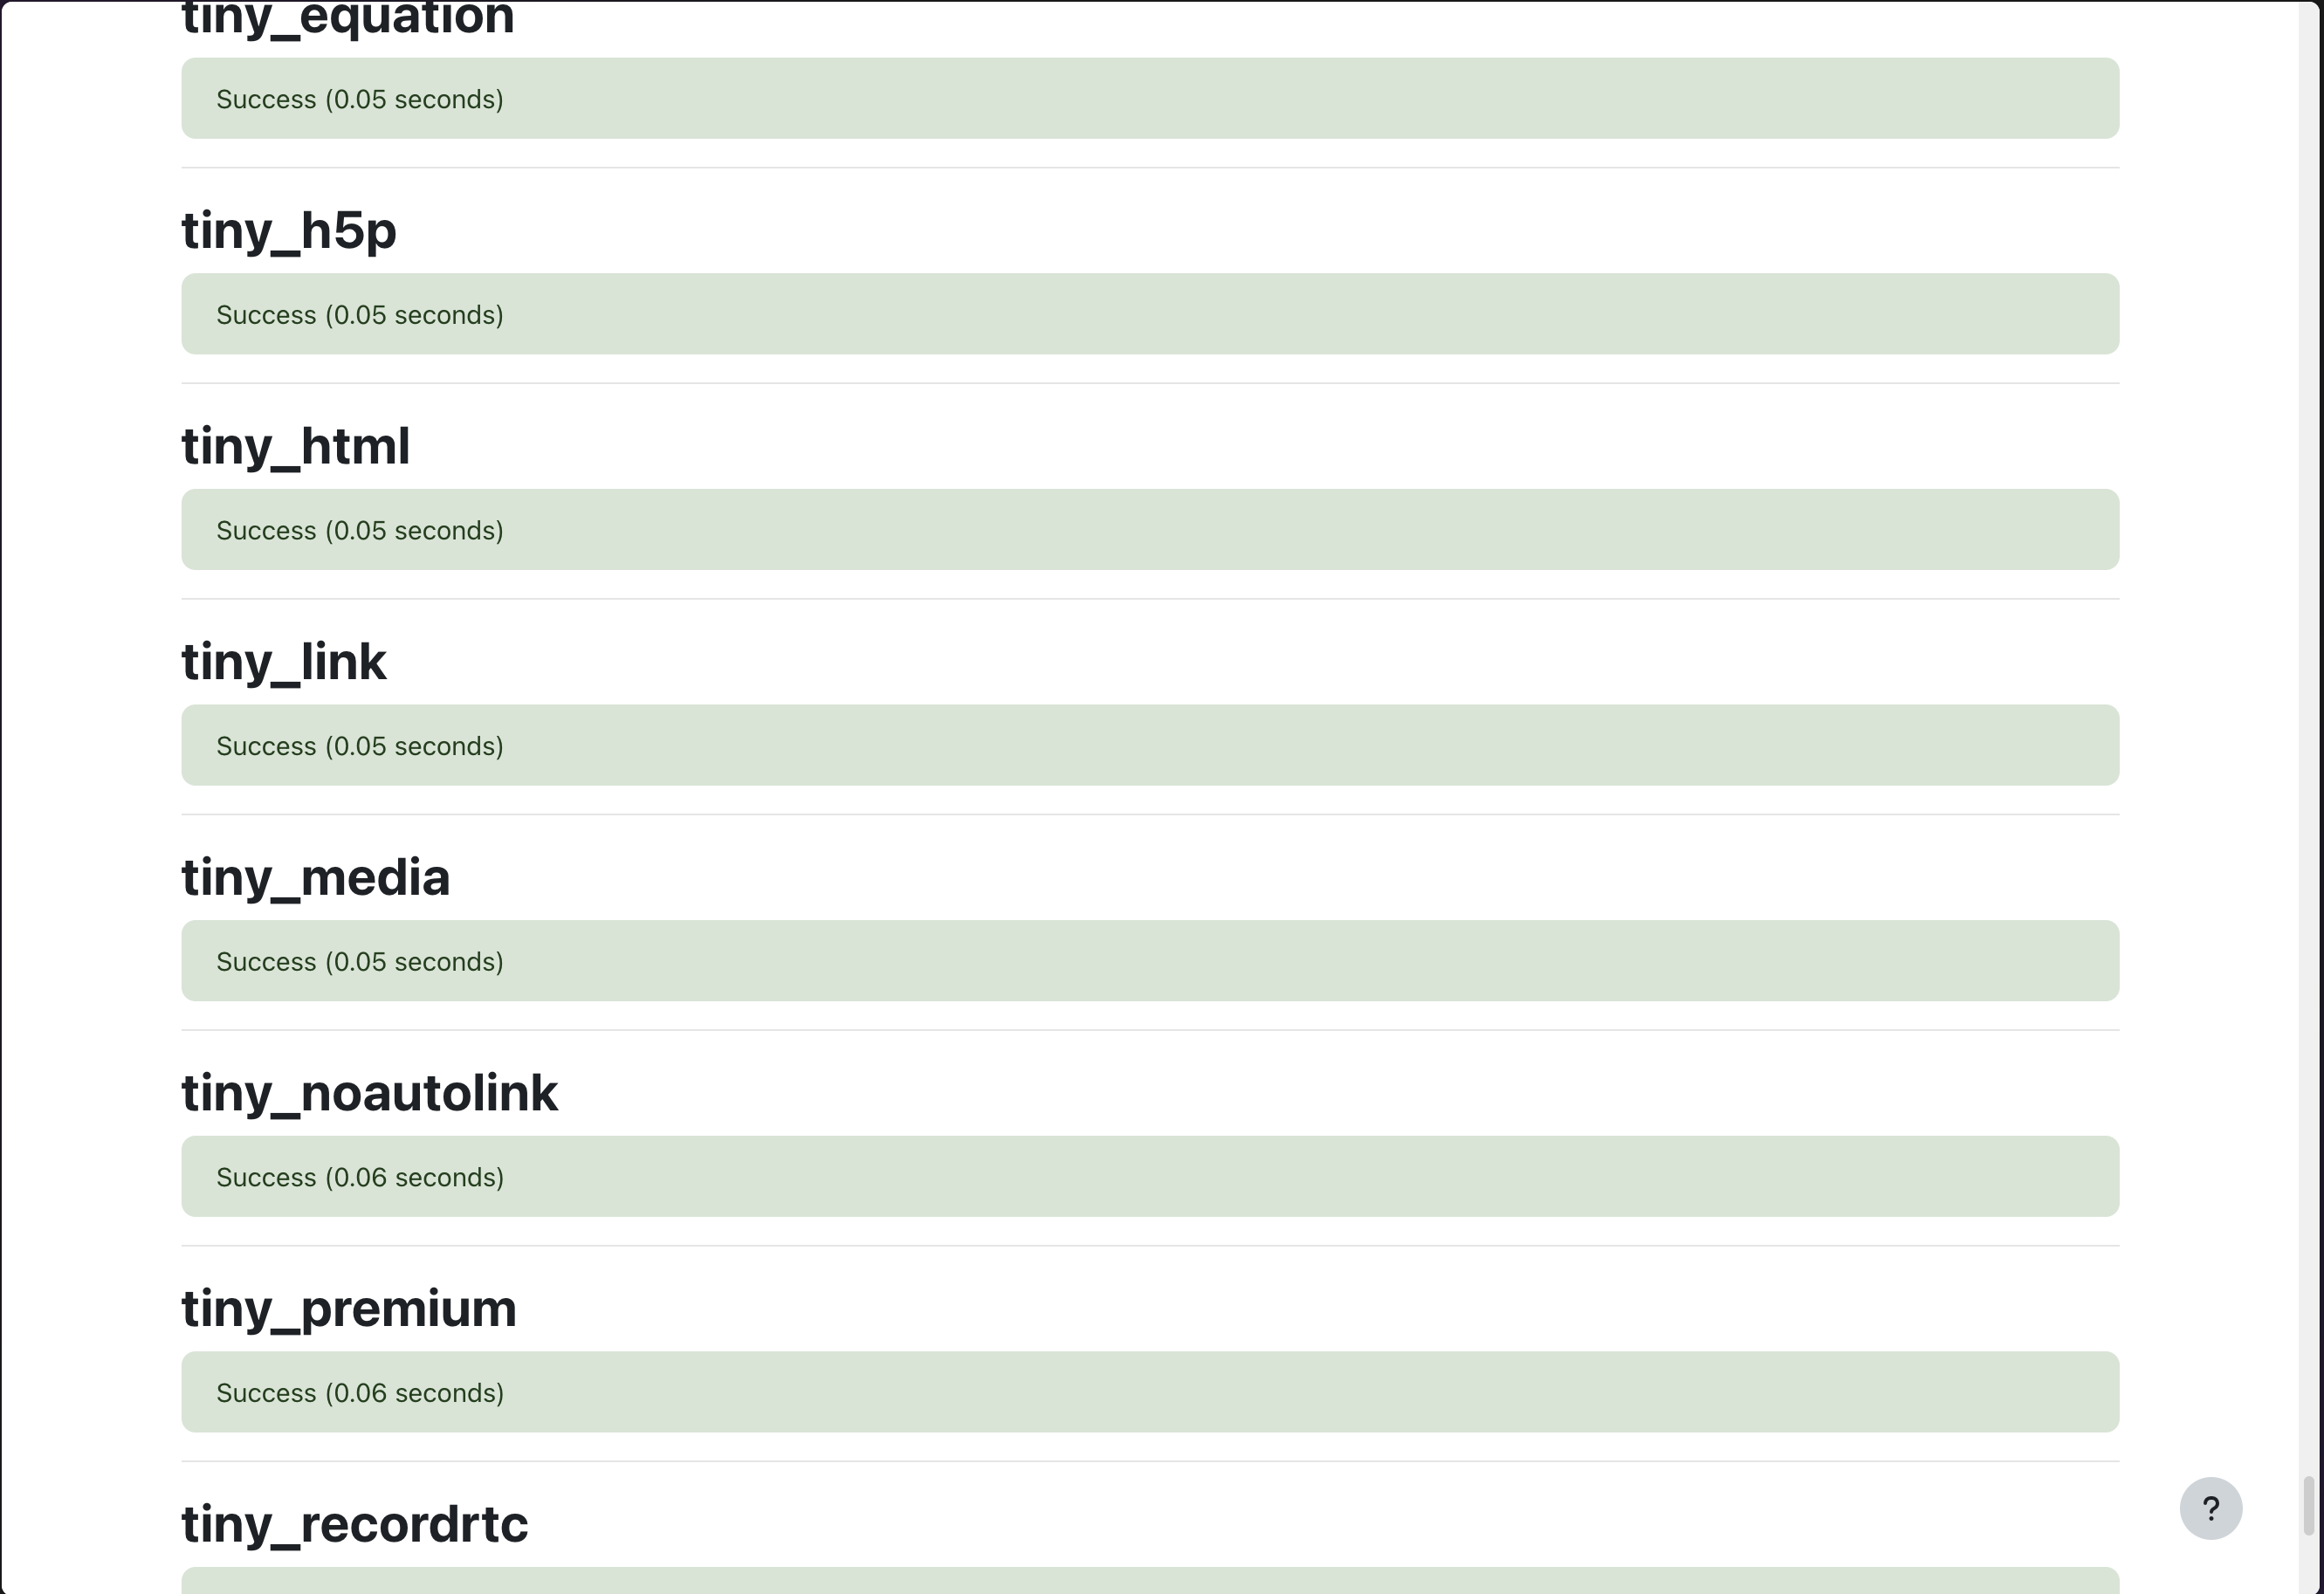
 Server Checks during Installation
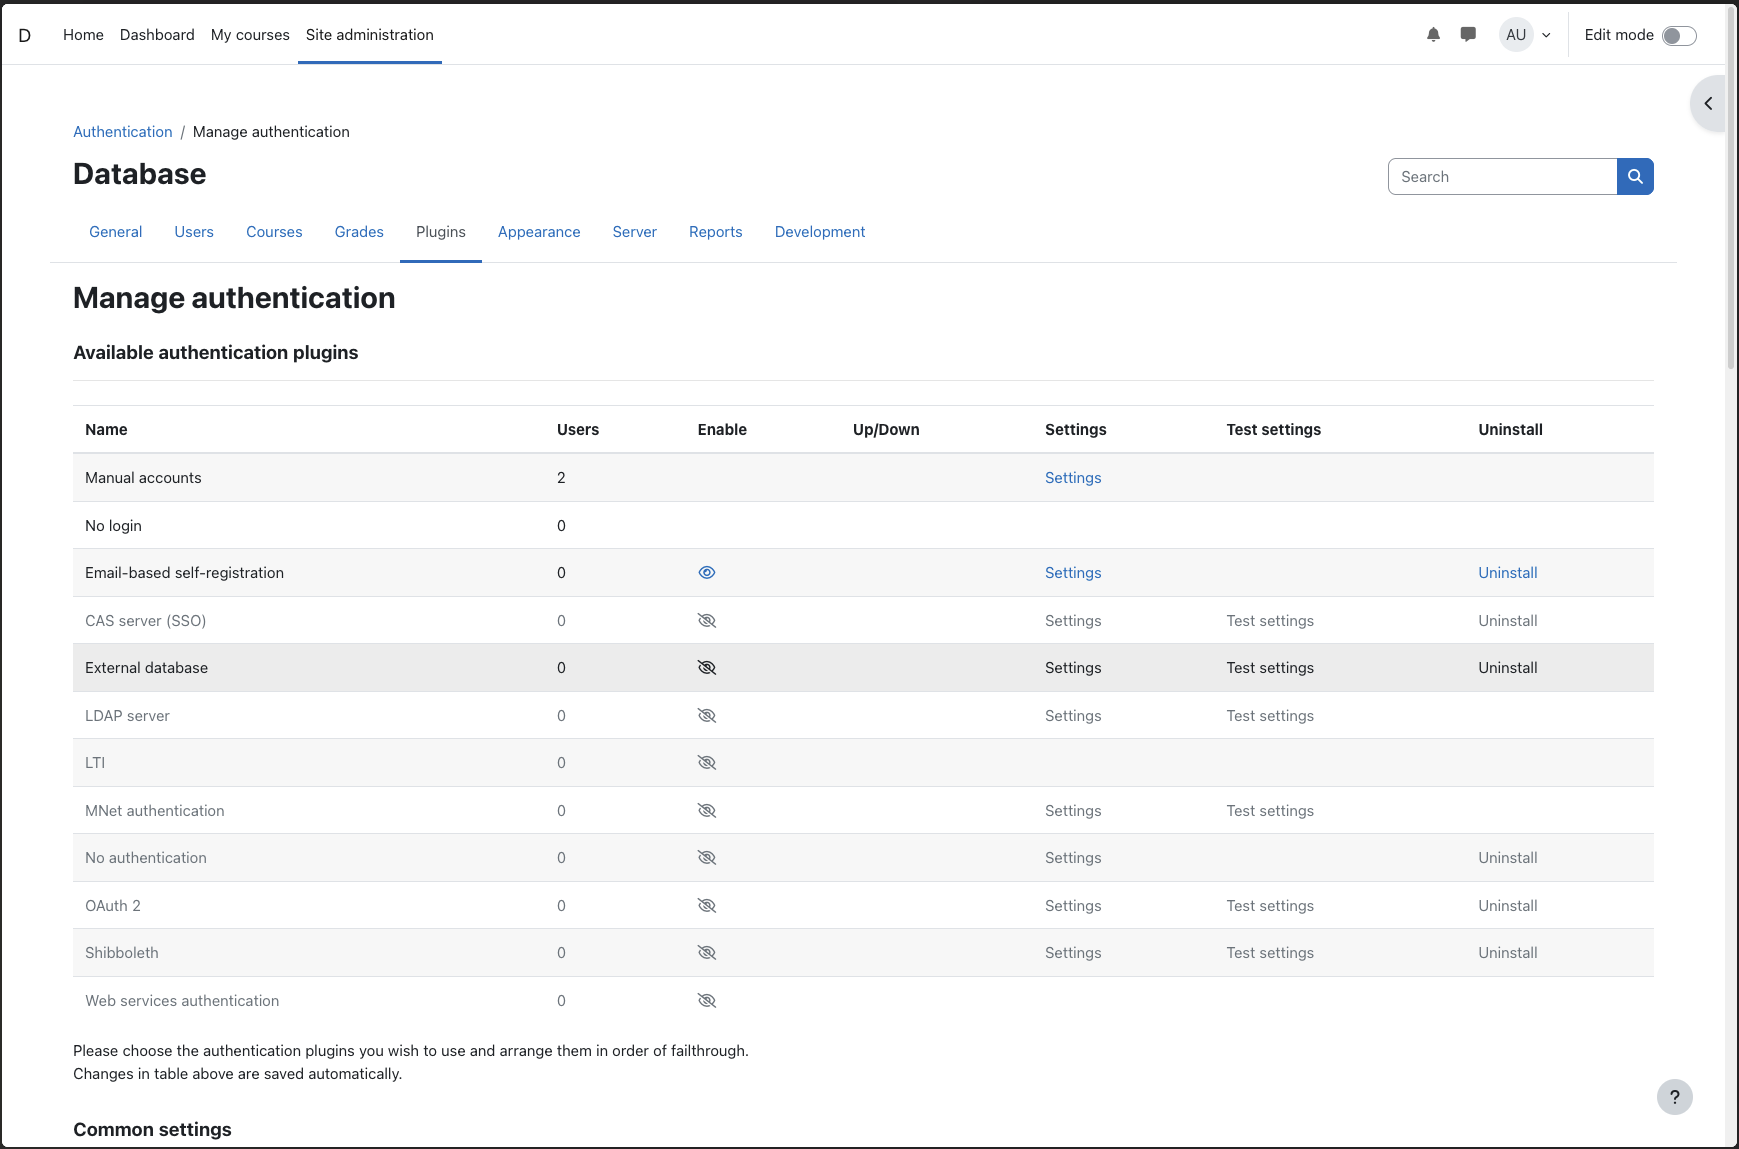 Authentication Management Page
-
Email-based self-registration: This is often enabled by default, allowing users to create their own accounts.
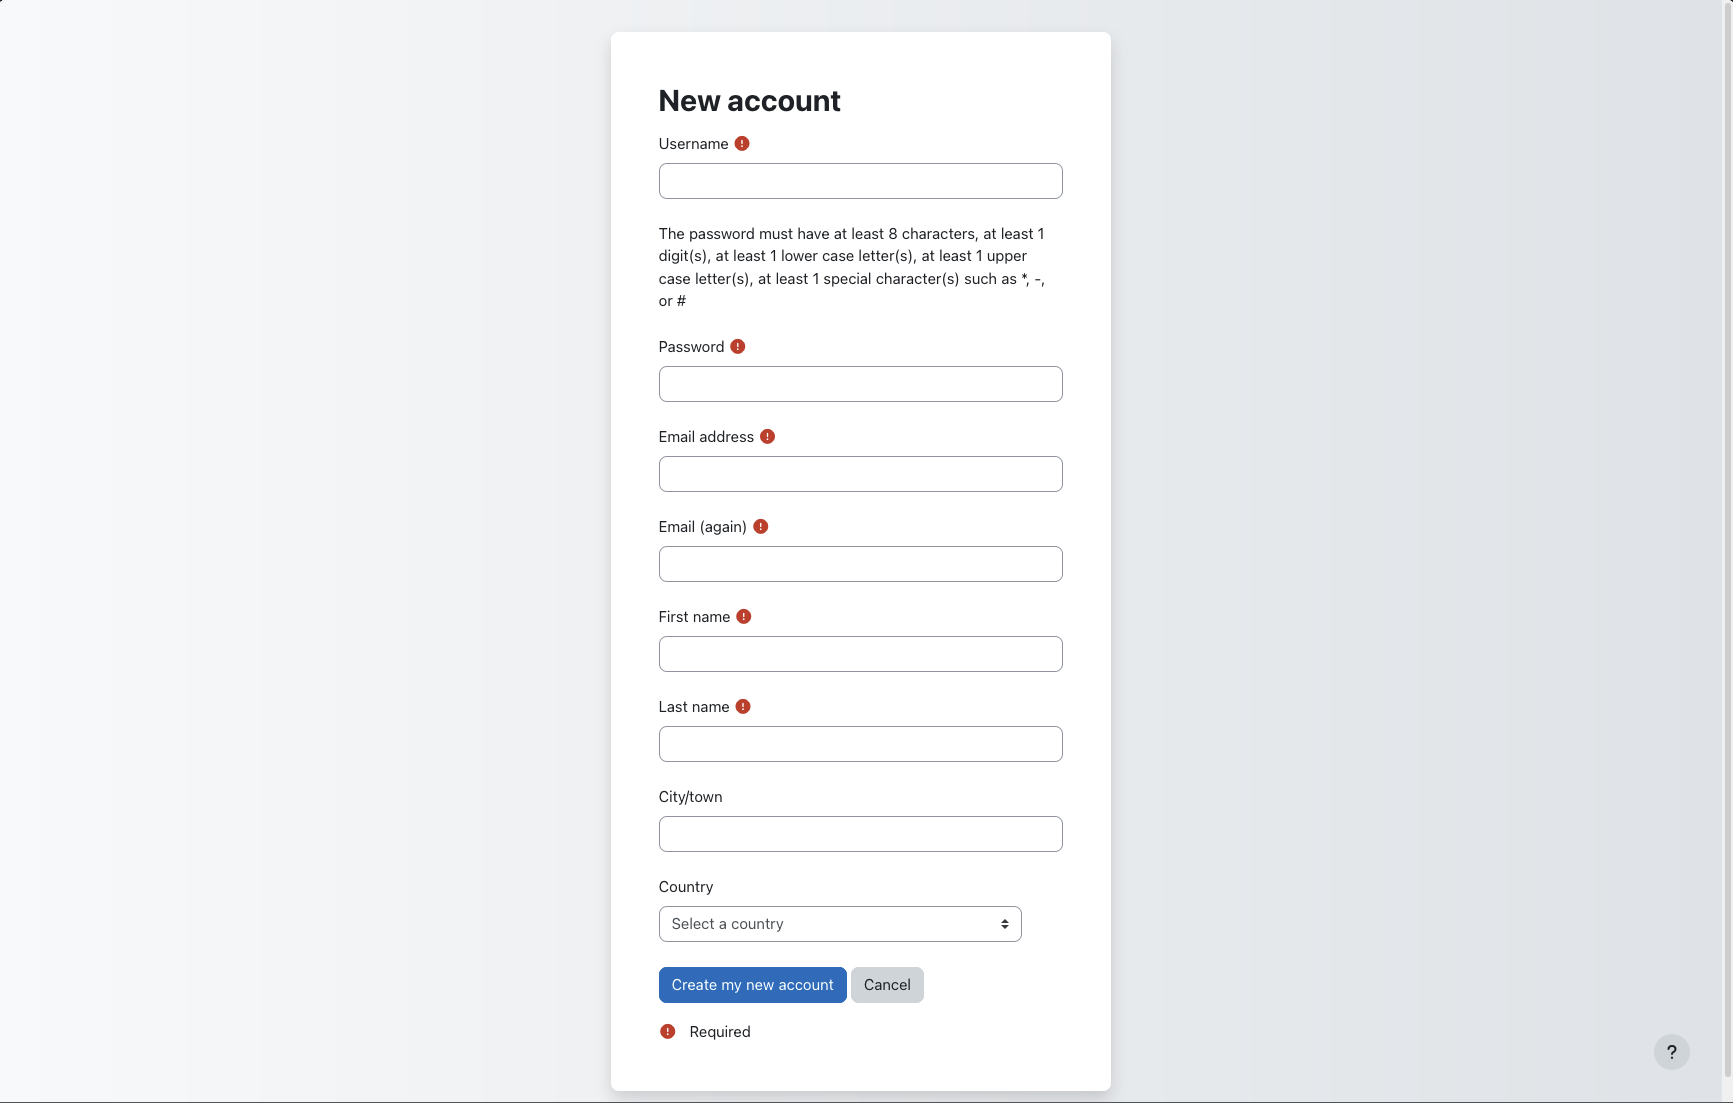 Standard Email Registration Form
 -
LDAP: Moodle supports LDAP authentication, allowing users to log in with existing directory credentials. Configuration requires details about your LDAP server. As mentioned earlier, setting this up effectively typically requires a properly configured domain and DNS, which was not available for this specific test setup.
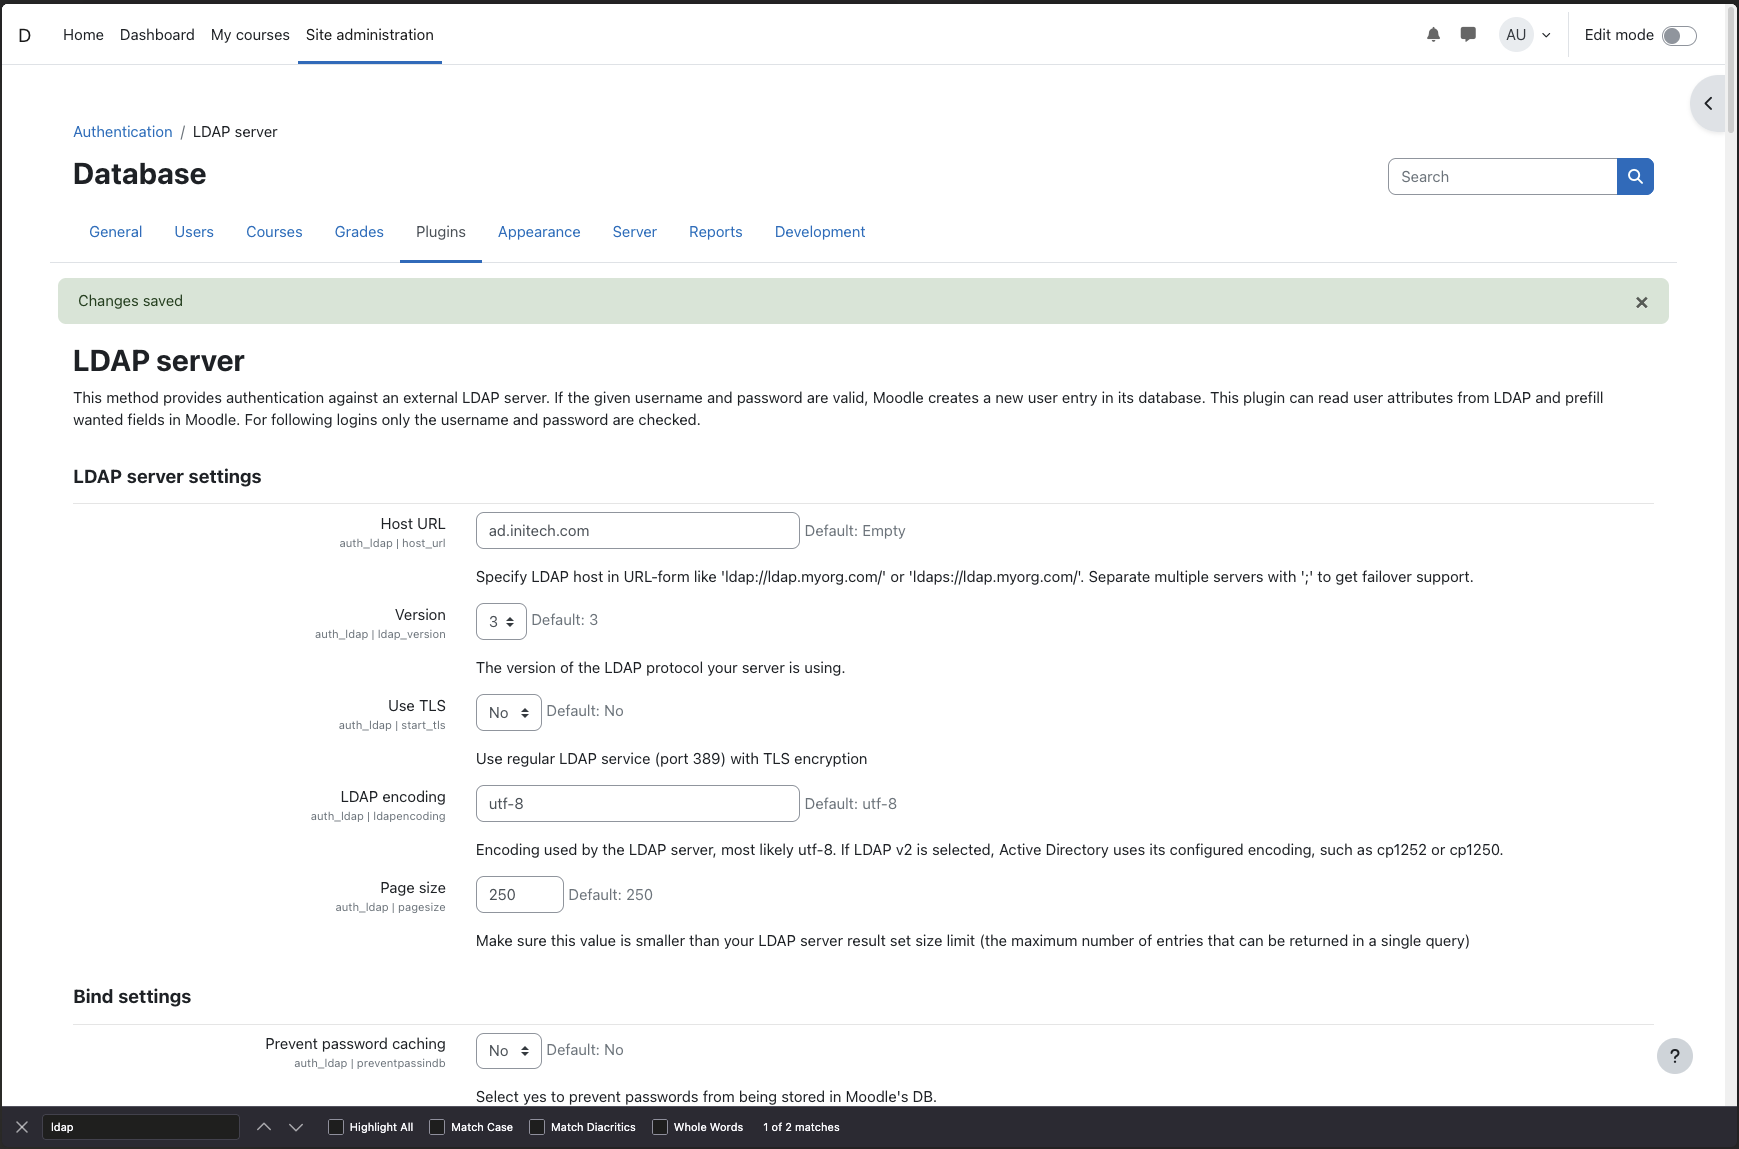 LDAP Configuration Screen
 -
Google OAuth 2: This allows users to log in using their Google accounts. It requires obtaining API credentials (Client ID and Secret) from the Google Cloud Platform. Setting up these credentials usually involves verifying domain ownership via DNS, which was a limitation in this setup.
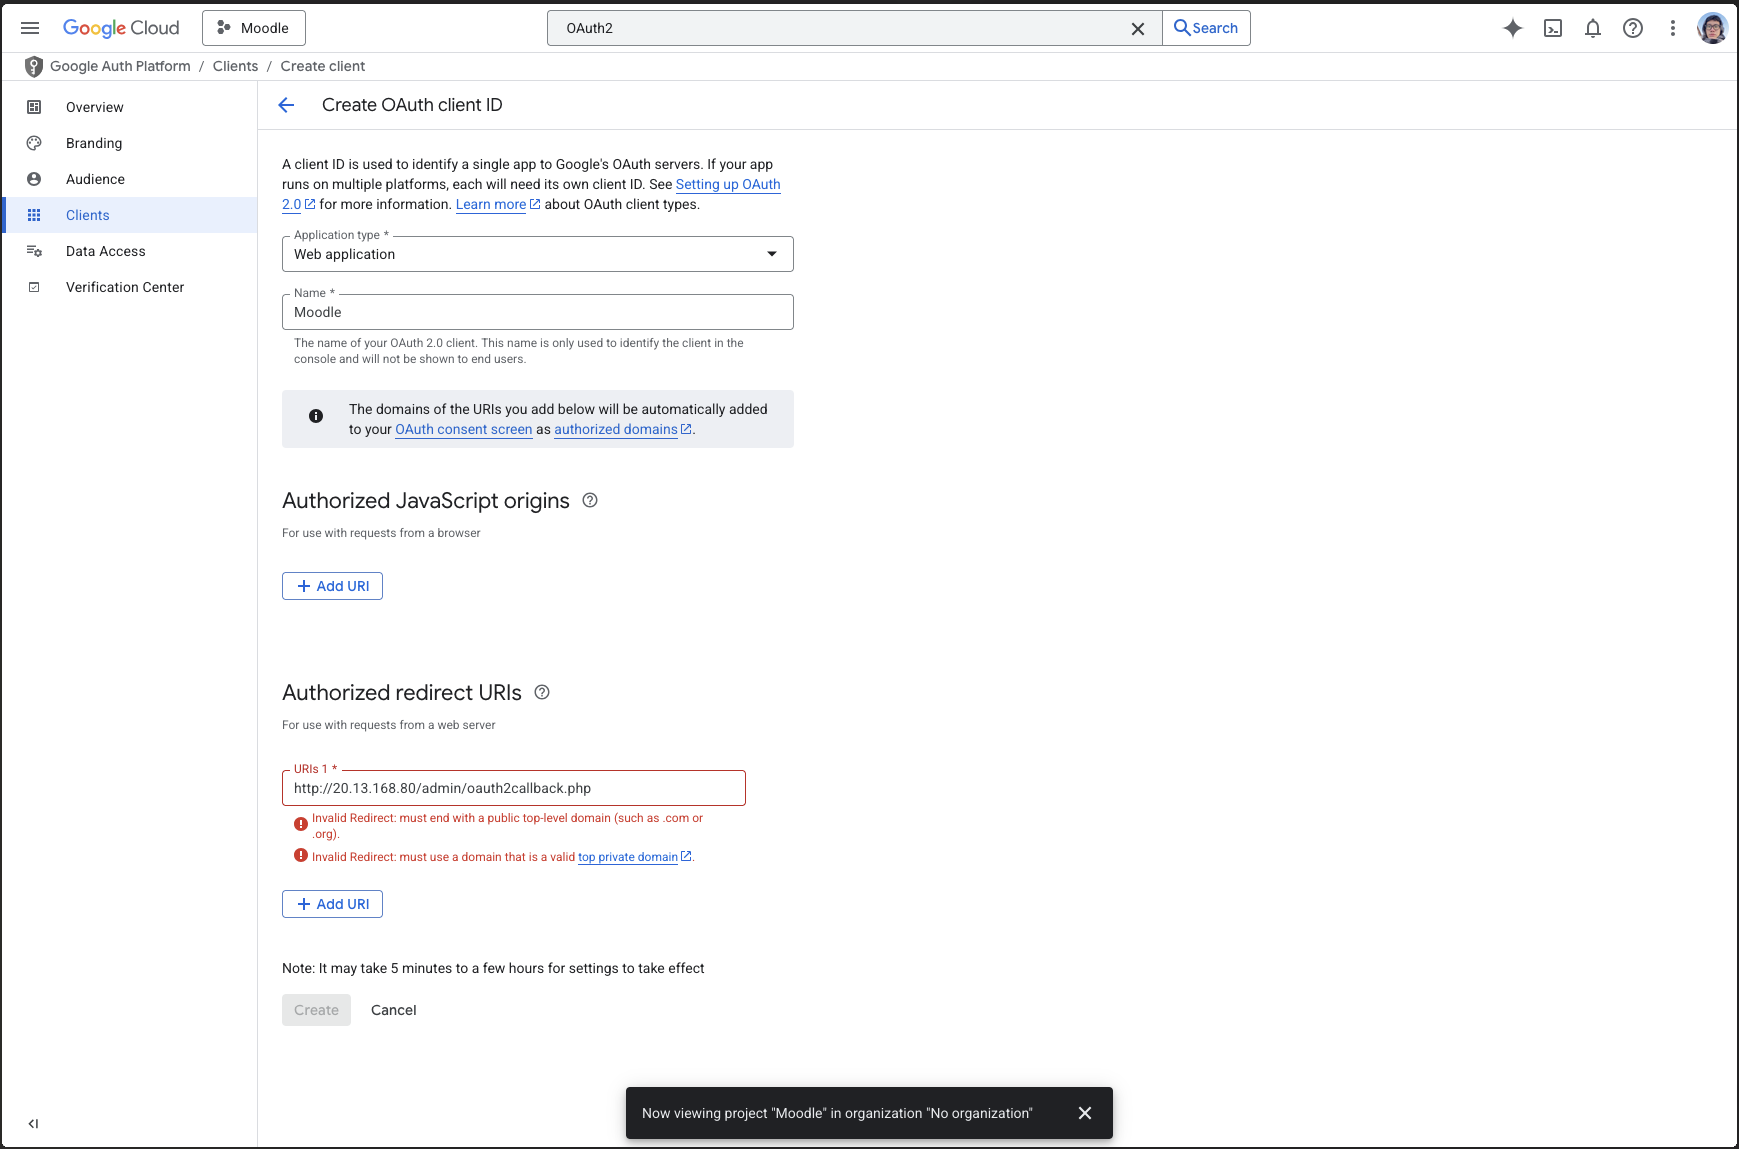 Google Cloud Platform Credentials Setup
 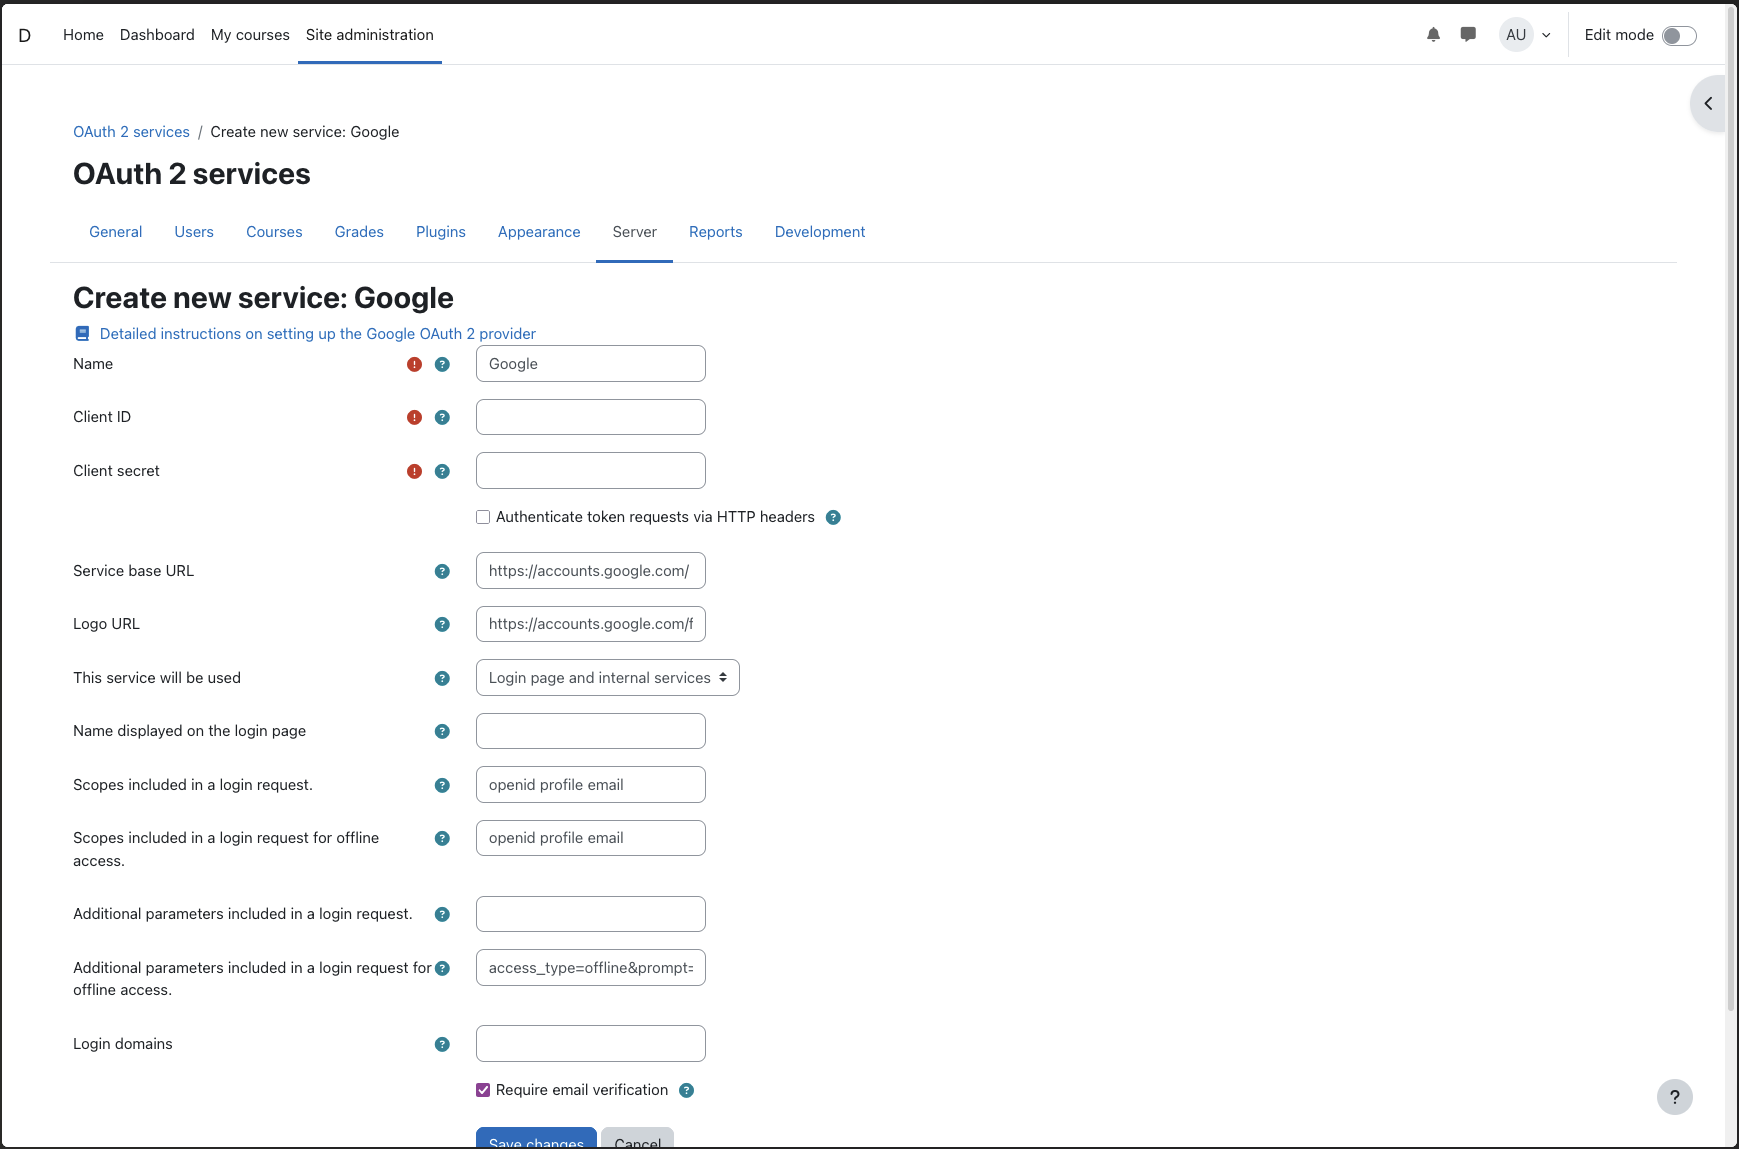 Moodle Google OAuth 2 Configuration Screen
7. Setting Up Backups
Regular backups are crucial for any Moodle instance. A simple backup strategy involves backing up the database and the Moodle file directories.
The following script performs a basic backup:
Database Backup: Uses mysqldump to create a SQL dump of the moodle database. Files Backup: Uses tar to create a compressed archive of the Moodle code (/var/www/html/moodle) and data (/var/www/moodledata) directories. Specific subdirectories containing transient data (cache, sessions, temp) are excluded to reduce backup size. Cleanup: Removes backups older than 30 days.
#!/bin/bash

# Database Backup
mysqldump -u moodleuser -p'YourPassword' --single-transaction moodle > /backup/moodle_db_$(date +\%F).sql

# Files Backup (with exclusions)
sudo tar -czvf /backup/moodle_files_$(date +\%F).tar.gz \
  --exclude=/var/www/moodledata/cache \
  --exclude=/var/www/moodledata/sessions \
  --exclude=/var/www/moodledata/temp \
  /var/www/html/moodle \
  /var/www/moodledata

# Cleanup old backups
find /backup -name "moodle_*" -mtime +30 -delete
Scheduling the Backup with Cron:
To automate the backup process, add the script to the system’s crontab.
Edit the root user’s crontab: sudo crontab -e Add the following line to run the backup script daily at 2:00 AM:
sudo crontab -e

# Run Moodle backup daily at 2 AM
0 2 * * * /usr/local/bin/moodle_backup.sh